
 5.0
5.0


How To Refinish Hardwood Floors: Guide 2025
08/22/2025
Reading Time ~ 18 minutes

 Donatas

Table of Contents
Refinishing hardwood floors restores the protective coat, erases surface wear, and lets the original grain shine—at a fraction of the price of new planks. Whether you’re tackling a full wood-floor sanding on your own or simply want to know what a pro crew will do, this guide covers every critical choice: tools, timelines, wood stains, and finish chemistry, so you complete the job once and enjoy it for years.
Can Your Wood Floor Be Refinished or Should It Be Replaced?
Most solid boards with at least 3 ⁄ 32 in. of wear layer can handle another round of hardwood floor refinishing, while engineered planks thinner than 2 mm—or any boards with structural damage—should be replaced or limited to a quick screen-and-recoat.
How Do I Test if My Finish Is Still Doing Its Job?
A teaspoon of water that soaks in within ten seconds and deep cross-grain scratches both show the finish is gone and full wood floor refinishing—not just polishing—is required.
- Beading water = surface still sealed: consider a screen-and-recoat.
- Immediate absorption = bare wood: plan a full wood floor sanding cycle.
- Light surface scuffs = spot touch-up possible; no heavy sanding needed.
How Thick Does the Wear Layer Need to Be?
Confirm at least 3 mm of usable wood by removing a floor register and checking the tongue-and-groove. If the exposed top tongue is thinner than a credit card, skip aggressive sanding.
Industry guidelines from the National Wood Flooring Association recommend a minimum wear layer of 3 mm for safe sanding.
- Solid red oak usually survives four to six full hardwood sand and finish cycles.
- Engineered flooring with a ≤ 2 mm veneer can only be lightly abraded; sanding through voids warranties and risks delamination.

When Is Screen-and-Recoat Enough?
If the finish is dull but intact—no grey spots, cupping, or pet-urine stains—a 120-grit screen pass plus two coats of polyurethane restores gloss in a day with minimal dust.
| Floor condition | Best approach | Why it works |
|---|---|---|
| Dull finish, no wood exposed | Screen-and-recoat | Refreshes sheen, adds protection |
| Light scratches < 0.5 mm deep | Screen-and-recoat + optional spot stain | Heavy sanding not yet needed |
| Grey wood, deep dents | Full hardwood floor refinishing | Wood fibers already damaged |
How Much Time and Money Does Hardwood Floor Refinishing Take?
For a 300 sq ft room, hardwood floor refinishing costs $2.50–$4.00 per square foot DIY or $3.00–$8.00 with a crew, and the space stays off-limits three to seven days from the first sand to furniture move-back.
What Is the 2025 Cost per Square Foot to Refinish Your Hardwood Floors?
Sticker shock is the biggest fear I hear from many homeowners, so let’s put hard numbers on the table before you rent gear or call a contractor.
| Item | Low | High |
|---|---|---|
| DIY materials (abrasives, stain, finish) | $750 | $1,200 |
| DIY tool rental (drum sander, edge sander, buffer) | $150 | $250 |
| Professional floor refinishing service | $1,350 | $2,400 |
Is It Cheaper to Rent or Buy Sanding Equipment for Floor Refinishing?
If you’re weighing a one-time project against future rooms, this quick comparison keeps you from overspending on tools you’ll rarely use.
- Renting a drum sander, buffer, and HEPA vac runs $55–$85 per day; buying used gear for multiple wood floor sanding jobs starts around $2 000. Rent to save money if you don’t use it often.
- Rent if you’ll refinish wood floors fewer than four times; buy only if you plan recurring work and have storage.
- Abrasives are the hidden cost driver—budget one coarse belt per 20 sq ft and one fine belt per 30 sq ft.
How Long Does It Take to Refinish Hardwood Floors (DIY vs Pro)?
Downtime stresses families more than the total cost; use this timeline to decide whether you can live through the cure period or need a hotel night.
| Stage | DIY Oil Poly | DIY Water Poly | Pro Crew |
|---|---|---|---|
| Sanding & first coat | Day 1 | Day 1 | Day 1 |
| Light buff & second coat | Day 2 | Day 1 evening | Day 1 evening |
| Walk in socks | Day 3 | Day 2 | Day 2 |
| Furniture back | Day 4–5 | Day 3–4 | Day 3 |
| Rugs down | Day 8 | Day 5–6 | Day 5 |
Add 24 hours if humidity tops 60 % or temperatures drop below 65 °F. Planning both cash flow and cure windows up front prevents sticky floors and rushed coats—essentials for a flawless hardwood floor refinish that lasts.
What Tools and Materials Do You Need for Wood Floor Refinishing Process?
A successful wood floor refinishing job never outruns its tool kit—show up short on abrasives, or without a proper drum sander, and every pass takes twice as long.
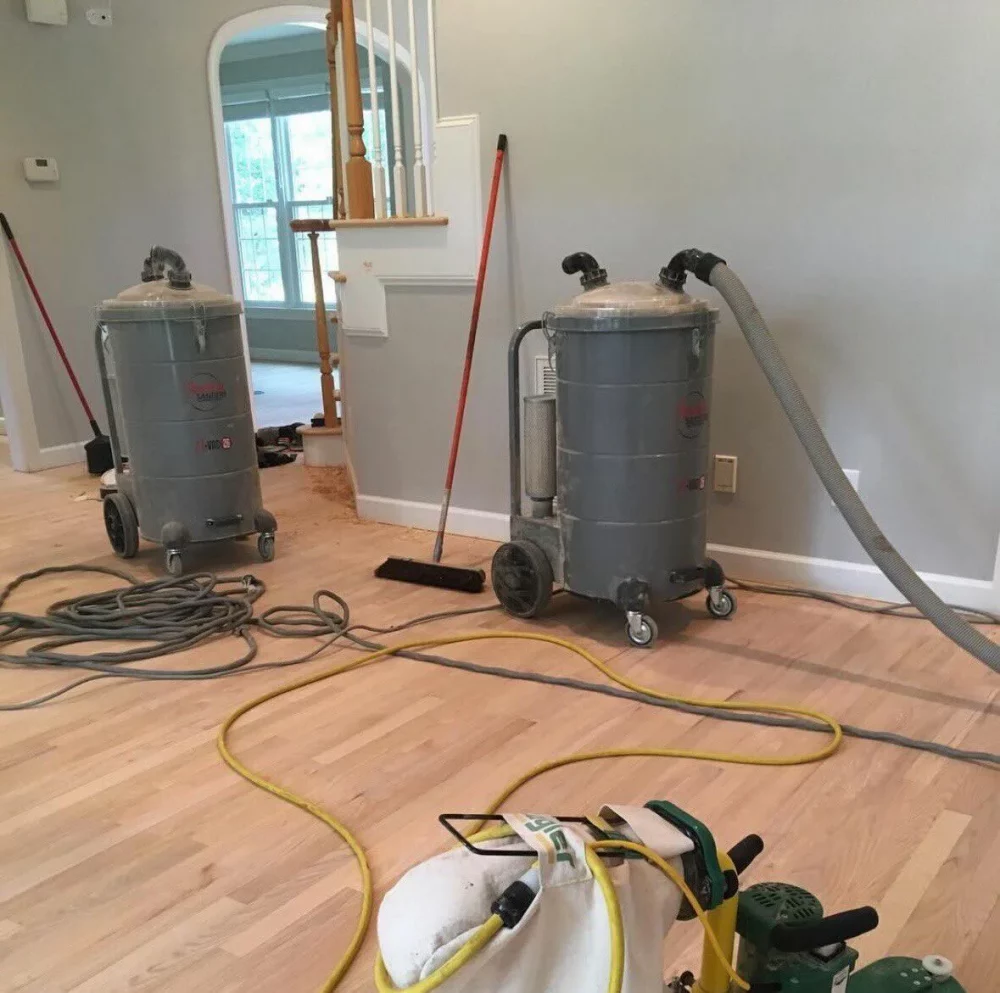
Which Power Tools Are Mandatory for Floor Sanding?
Skip gimmicks and rent what delivers flat, streak-free cuts on the first try.
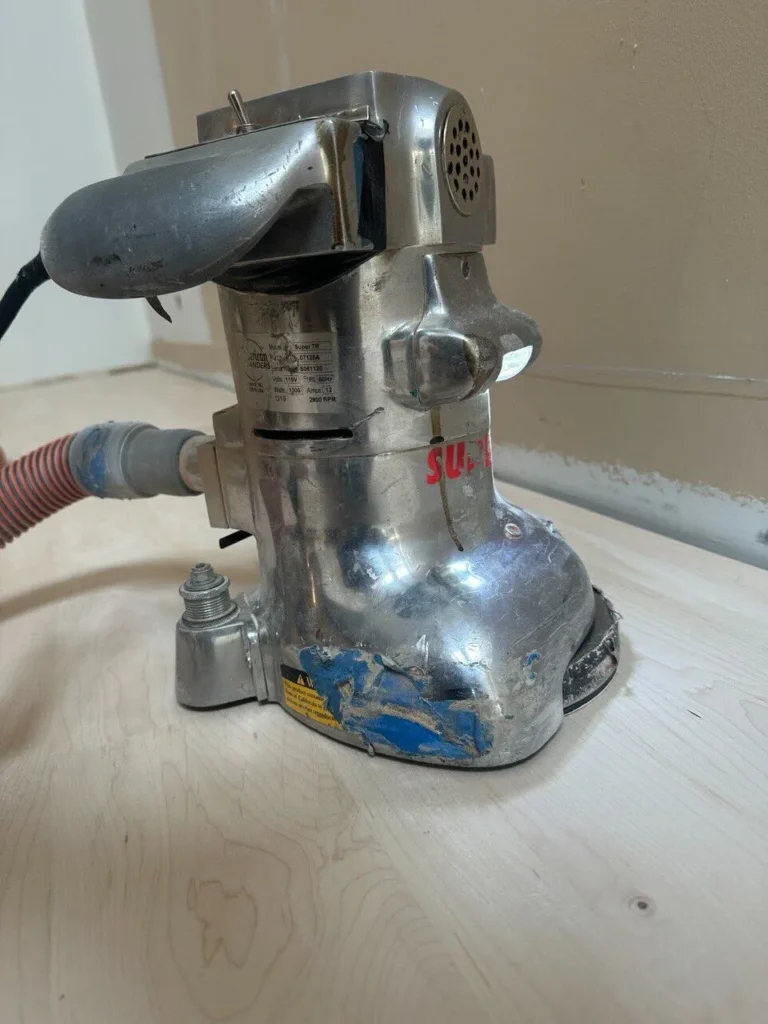
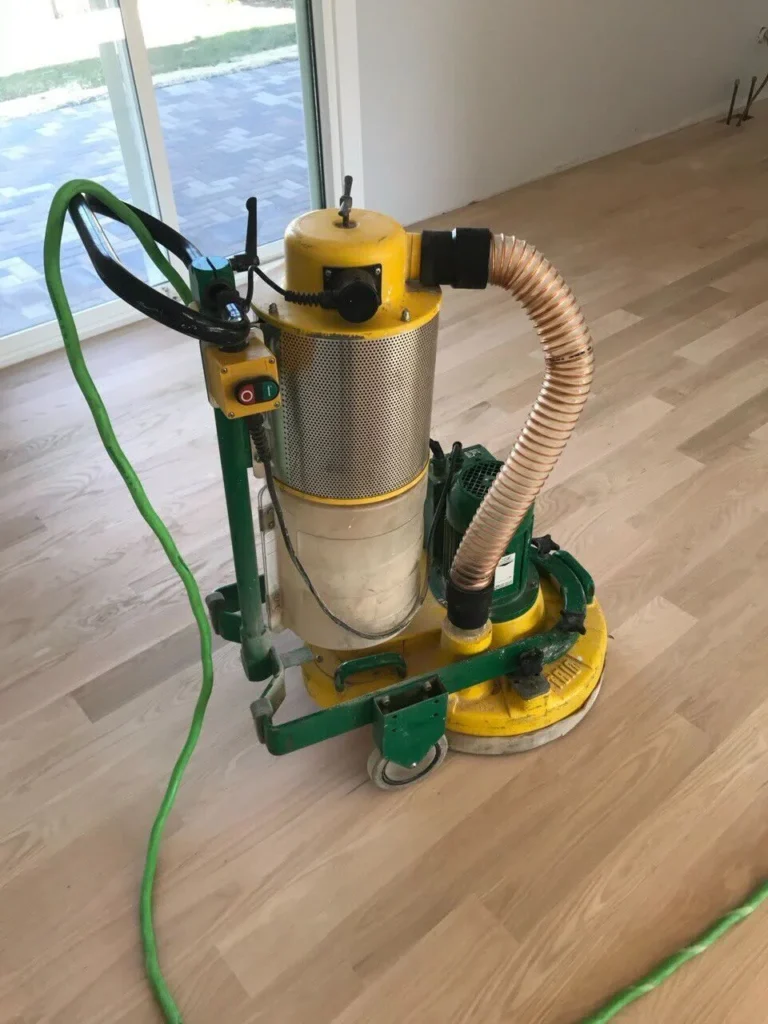
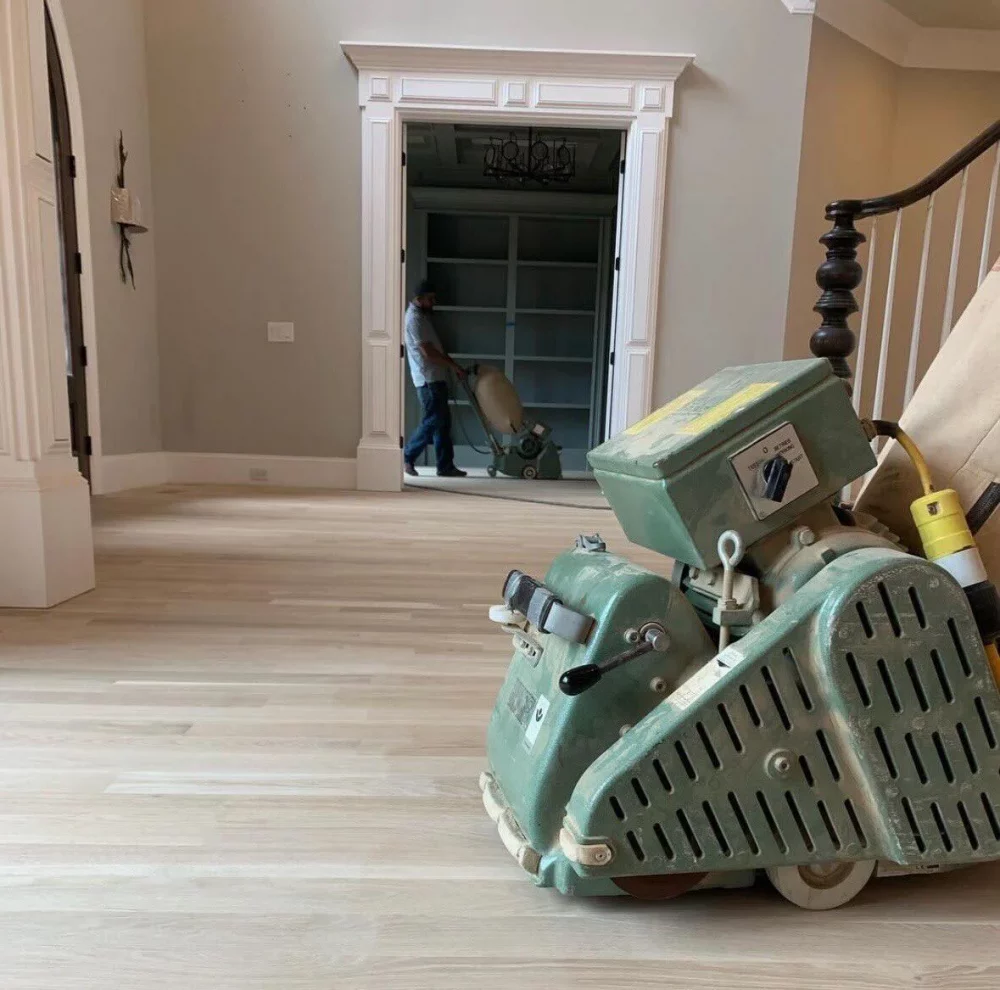
- Drum sander — fastest way to remove an old wood floor finish and level high spots.
- Edge sander — reaches baseboards and radiator legs the big sander misses.
- Buffer (or random-orbit) — blends scratch patterns and drives a 120-grit screen before finishing.
- HEPA shop-vac — captures fine dust so the next coat bonds clean.
How Many Abrasives Should I Budget?
Running out of belts mid-job forces you to reuse dull media that scorches wood. Use this chart to buy once and finish on schedule.
| Grit | Belts/Discs Needed | Purpose |
|---|---|---|
| 40 | 15 | Strip old finish from hardwood floors fast |
| 60 | 12 | Remove 40-grit lines |
| 80 | 10 | Prep for stain |
| 120 (screen) | 8 | Final smooth before coat |
What Protective Gear Keeps Floor Refinishing Safe?
Dust and solvent fumes are the hidden hazards most DIY guides skip. Just gear up once and breathe easy all week.
- P100 respirator with organic-vapor cartridges
- ANSI-rated safety glasses; silica dust scratches corneas
- Hearing protection (drum sanders hit 100 dB)
- Nitrile gloves for stain and water-based finishes
- Knee pads and disposable coveralls to save joints and laundry
Buying the right consumables and safety kit on day one prevents mid-project runs to the store and keeps your floor sanding and refinishing timeline on track.
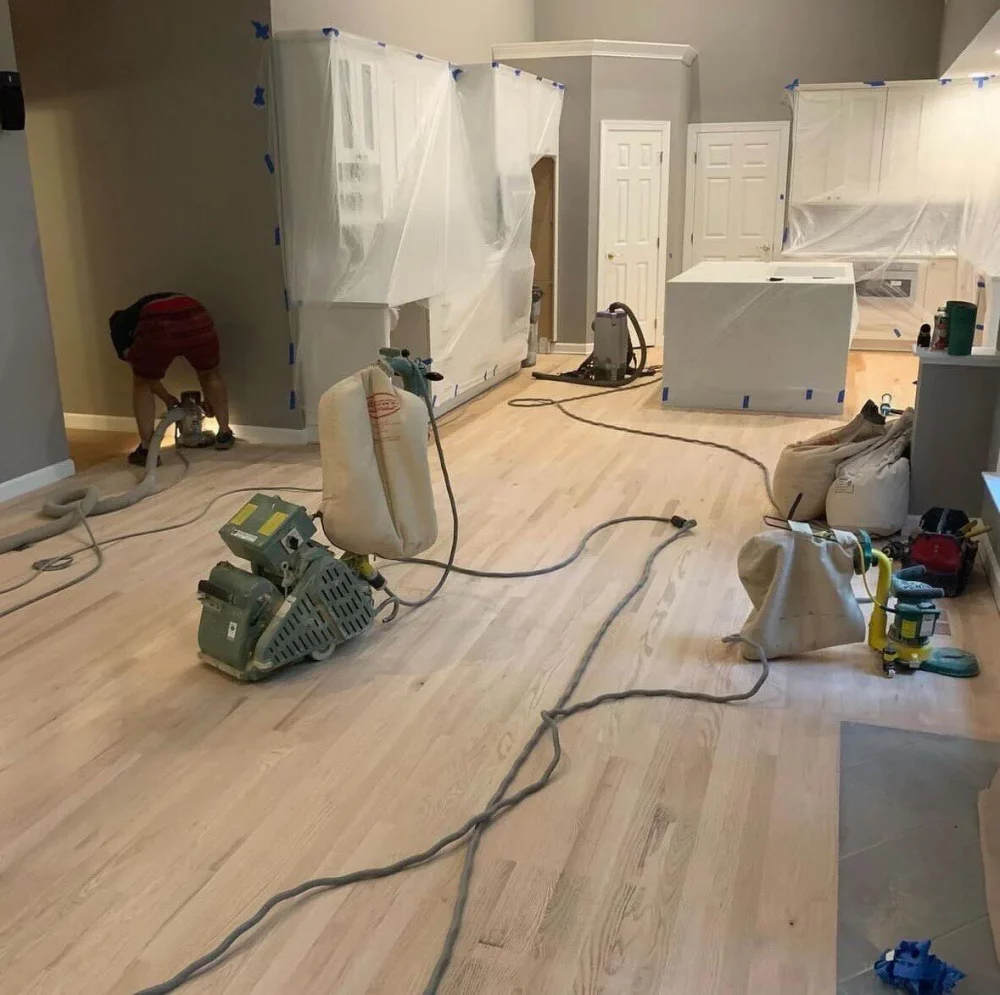
How Do You Prep a Room for Dust-Controlled Hardwood Floor Refinishing?
Dust is the top headache after a floor refinishing project—fine grit sneaks through vents, scratches fresh paint, and ruins new coats. Investing about an hour in thorough prep saves days of cleanup and keeps your floor finish blemish-free.
What Should Be Removed Before Wood Floor Sanding Starts?
Clear the space down to bare flooring; anything left behind traps dust and slows progress:
- Furniture, appliances, and window treatments
- Interior doors (hinge pins pop out with a flat screwdriver)
- Base-shoe moulding if you want stain to reach the edges
- Outlet covers—hidden dust hotspots most redoing hardwood floors overlook
How Do You Build a Dust-Containment Barrier?
A plastic “room-within-a-room” stops airborne grit at the doorway and ceiling line.
- Hang 4-mil sheeting from crown to floor using painter’s tape and spring poles.
- Overlap seams 12 in. and seal with tape.
- Slice a vertical slit and install a zipper for tool access.
- Run the hose of a HEPA vac outside the barrier to maintain negative pressure.
How Do You Protect HVAC and Adjacent Rooms?
Dust blown into ductwork resurfaces for weeks; block it before sanding starts.
| Task | Why It Matters |
|---|---|
| Tape every supply and return vent shut | Keeps dust out of ductwork |
| Switch off forced-air system during sanding | Prevents pressure spikes |
| Seal under door gaps with painter’s tape | Blocks drift into hallways |
| Cover smoke detectors temporarily | Avoids false alarms during flooring refinishing process |
Finish prep by staging a sticky-tack mat at the exit: each time you leave, dust stays on the mat—not throughout the house. An hour of sealing and masking up front makes sure the only thing that exits the work zone is your vacuum, not clouds of dust.
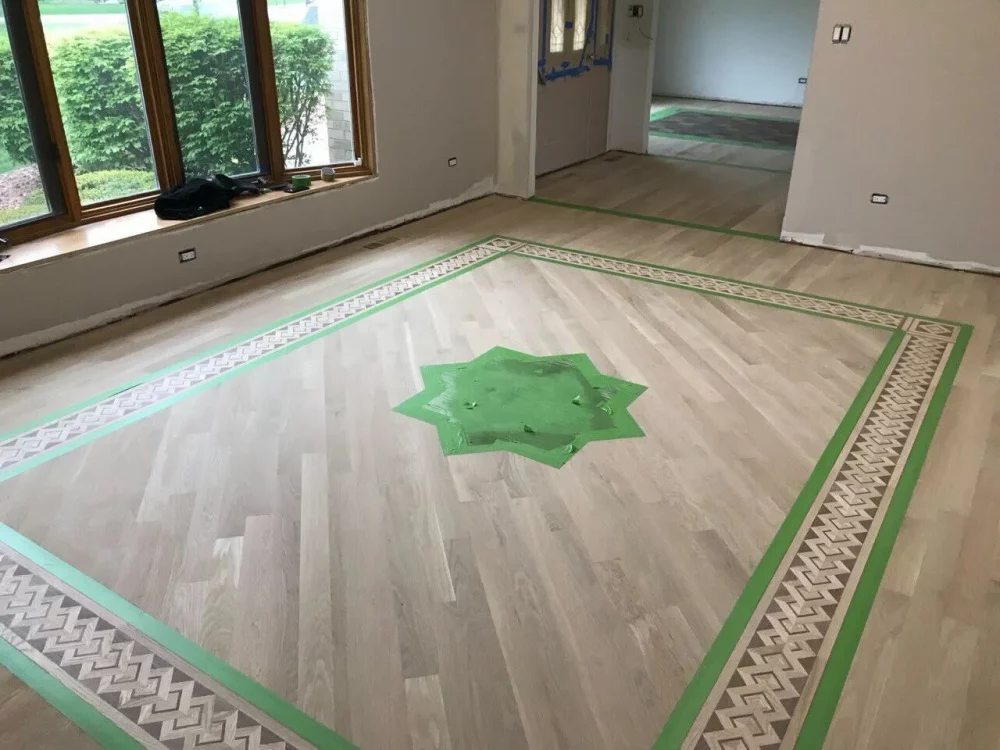
How Do You Sand a Hardwood Floor Step by Step?
A clean, level surface comes from a strict four-pass grit sequence and smooth, overlapping strokes—miss either one and your wood floor sanding leaves ripples that even the best finish can’t hide.
Sanding a floor is a systematic four-pass sequence: strip the old floor finish, refine scratches, buff to 120 screen, and vacuum to bare wood.
- Install a coarse 40-grit belt on the drum sander; run with the grain, overlapping each pass by one-third.
- Edge sand the perimeter with 40 grit, feather the last six inches into the field cut.
- Vacuum and inspect; switch to 60-grit belts and repeat field and edge passes.
- Repeat with 80 grit to erase remaining scratches, check under raking light.
- Buff the entire floor with a 120-grit screen on a buffer; hand-scrape corners.
- Vacuum twice and tack-wipe until the cloth comes up clean—now the wood is ready for stain or sealer.
What Is the Correct Grit Progression for Floor Sanding?
Starting too fine leaves finish behind; starting too coarse digs trenches you’ll chase all day. You need to pick the correct sanding pads.
| Pass | Grit | Purpose | Pro Tip |
|---|---|---|---|
| 1 | 40 | Strip old finish, flatten high spots | Lift the drum sander before stopping to avoid drum marks |
| 2 | 60 | Remove 40-grit scratches | Vacuum thoroughly between passes |
| 3 | 80 | Prep for stain or natural tone | Inspect against window light for missed patches |
| 4 | 120 | Final smooth before sealer | Use a buffer to eliminate swirl marks |
How Do You Sand Edges and Corners Without Gouging?
The big machine stops three inches from the wall, so perfection lives in the details.
- Run the edge sander clockwise so the disc cuts into the baseboard, not away from it.
- Keep even pressure; rocking digs half-moons that telegraph through stain.
- Finish tight corners with a sharp scraper, then hand-sand 120 grit to blend.
How Do You Prevent Chatter, Waves, and Gouges On the Floor?
Surface ripples come from dull abrasives or rushed technique—prevent them before they ruin the final coat.
- Replace belts as soon as they glaze; burned grit can’t cut clean.
- Walk the drum at a steady ten feet per minute—faster leaves skip lines
- Keep the drum flat; rocking digs troughs that even heavy floor finishing can’t hide.
- Turn off ceiling fans; airflow lifts dust onto fresh passes and raises grain.
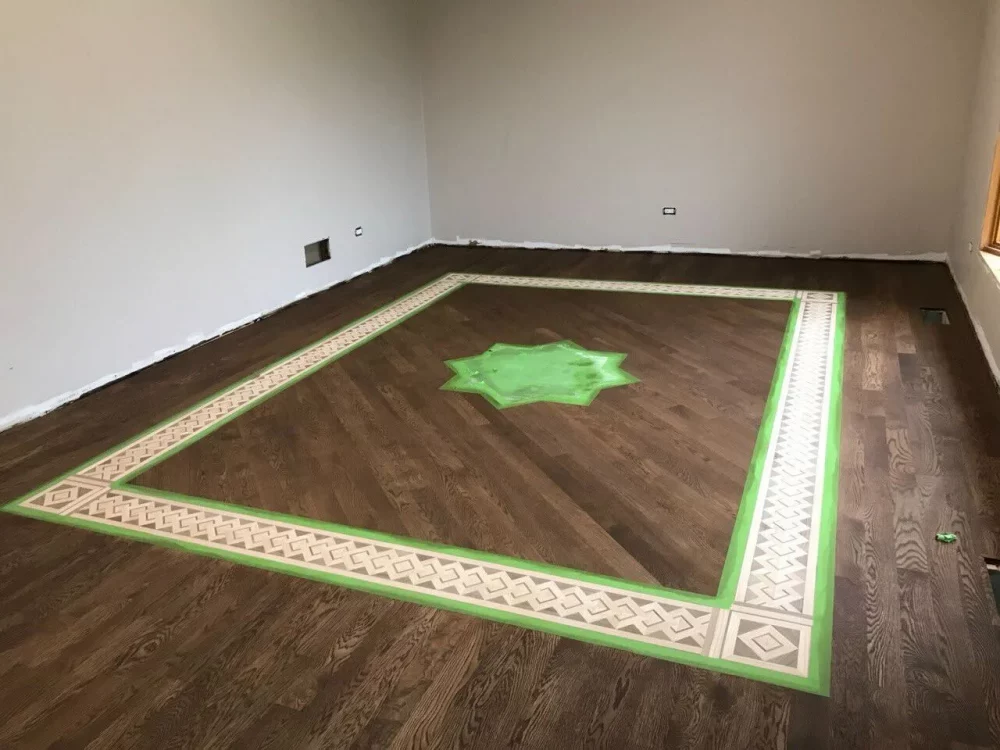
How Do You Achieve the Color You Want When Refinishing Hardwood Floors?
Dialing in the perfect tone means combining wood stain, bleach, and water-popping in the right order. Each method targets a different goal—adding depth, removing dark spots, or opening pores—so you end up with a uniform, lasting finish.
How Do I Select the Right Stain for My Hardwood Floors?
Choosing between stain types comes down to dry time, durability, and the look you want under floor finishing.
Before you buy, test samples on scrap or in an inconspicuous corner. Different wood types absorb color unevenly.
| Stain Type | Dry Time | VOC Level | Look & Use Case |
|---|---|---|---|
| Oil-Based Stain | 24 h | High | Deep, rich color; long working time |
| Water-Based Stain | 4–6 h | Low | Clear, modern tone; eco-friendly |
| Gel Stain | 24 h+ | Medium | Thick body; hides blotch-prone wood |
For more on how VOCs affect indoor spaces, see the EPA’s Indoor Air Quality guidelines.
How Do I Bleach Hardwood Floors Safely?
Oxalic-acid bleach strips dark water and pet stains without harming the wood. If you’ve ever seen black rings from spills, this is your solution.

- Dissolve oxalic acid in warm water per label.
- Apply with a brush to stained areas; scrub lightly.
- Rinse thoroughly with clean water and let dry 24 h.
- Neutralize any residue with a baking-soda rinse if required by the product.
What Is Water-Popping and When Should I Use It for My Floor?
Water-popping raises the grain, so the stain lays in the pores, giving a deeper, more uniform color.
- Mist the floor with water; let the wood swell for 15 min.
- Sand lightly with 120-grit to knock down raised fibers.
- Proceed immediately to staining so pores stay open.
Use water-popping on dense woods like red oak or maple to avoid blotchiness and lock in an even tone across the entire floor.
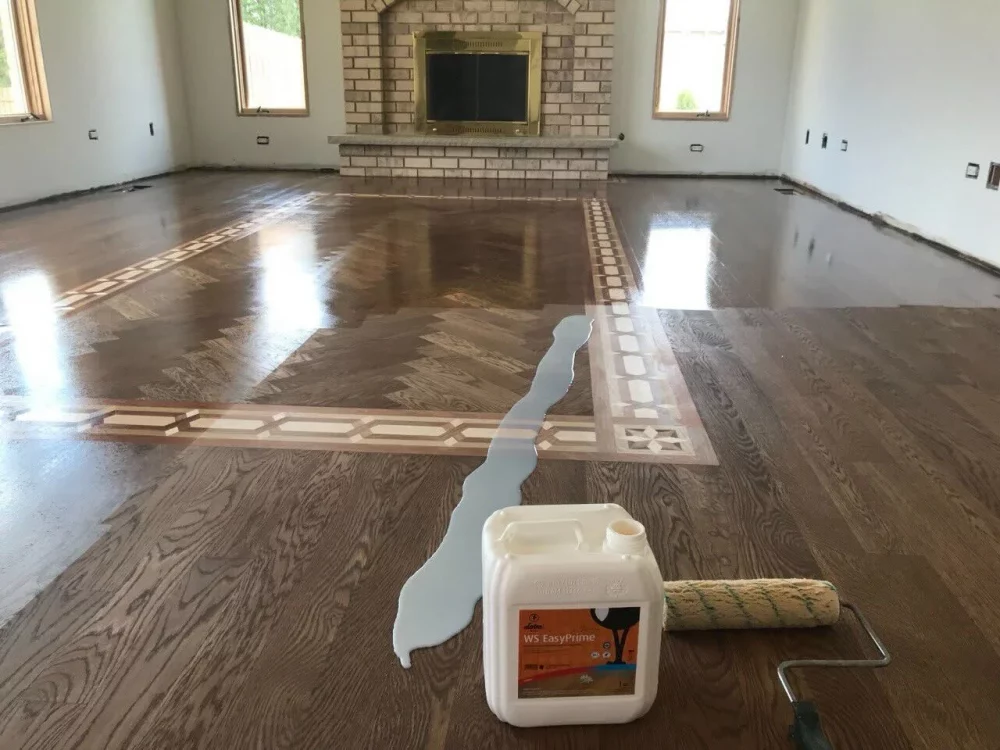
Which Finish Should You Choose and How Do You Apply It?
Choosing the right coat protects decades of hardwood refinishing and suits your lifestyle—most pros now prefer water-based polyurethane for its clear, durable finish and low odor, but oil-based, hard-wax oils, Swedish acid-cure, and UV-cured systems still have their place in high-traffic or commercial settings.
Which Floor Finish Type Should You Choose?
A finish failure can ruin days of sanding—match abrasion resistance, cure time, and aesthetics to your room’s use and occupants.
| Finish Type | Durability | Dry Time | Odor Level | Best For |
|---|---|---|---|---|
| Water-Based Poly | Very High | 4–6 h | Low | Almost any residential area |
| Oil-Based Poly | Very High | 24–48 h | Strong | Heavy-traffic zones |
| Hard-Wax Oil | Medium | 12–24 h | Mild | Natural look, easy spot repair |
| Swedish Acid-Cure | Very High | 12–24 h | Very Strong | Commercial-grade sheen |
| UV-Cured | Extreme | Minutes | None | Factory-finished, rapid turnaround |
Look for finishes with GreenGuard Certification to ensure low emissions and safer indoor air.
How Do You Apply Finish and How Many Coats Are Appropriate?
Getting coat count and technique right prevents peeling, cloudiness, and uneven sheen.
Stir the Finish
Stir the finish gently; never shake bottles to avoid bubbles.
Cut in Edges
Use a brush for edges, then a foam roller or lambswool pad for larger fields.
Apply Coats
Apply two thin coats for low-traffic rooms, three for high-traffic areas like kitchens or hallways.
Sand Between Coats
After drying, lightly sand with 220-grit or a maroon pad, then vacuum and tack-wipe before recoating.
Final Cure
Allow the finish to harden fully per manufacturer’s instructions before moving furniture or rugs back.
What Safety Precautions Should You Take When Refinishing Hardwood Floors?
Refinishing exposes you to dust, fumes, and chemicals—treat every step, from sanding to coating, with the same safety mindset you’d use for solvent work.
- Wear a P100 respirator whenever you sand or apply any floor finish, even low-odor water-based polyurethane.
- Use eye protection and nitrile gloves to shield against flying debris, splashes, and solvents.
- Ventilate the room: run fans and open windows during sanding and while each coat cures.
- Protect hearing: drum sanders exceed 100 dB—earmuffs or plugs are a must.
- Seal vents and smoke detectors before work to avoid dust infiltration and false alarms.
- Check local VOC rules. Water-based formulas generally comply but always verify regulations in your area.
How Long Does Curing Take and When Can I Move Furniture Back?
Curing is more than “dry to the touch”—it’s when the finish fully hardens under load. Move furniture too soon and you risk indentations, scuffs, or clouding that undo all your floor refinishing work.
A water-based polyurethane finish cures enough for light foot traffic in 4–6 hours and supports furniture in 48–72 hours, while oil-based poly usually takes 24 hours for socks-only, 72 hours for furniture, and 7 days for rugs or heavy pieces. But there is more to it.
What Is the Walk-On and Furniture Move-Back Timeline?
Knowing exactly when you can step on or set furniture down prevents damage and avoids gouges from premature use.
| Stage | Water-Based Poly | Oil-Based Poly |
|---|---|---|
| Walk in socks or slippers | 4–6 h | 24 h |
| Move furniture (no rugs) | 48–72 h | 72 h |
| Replace area rugs | 3–5 days | 7 days |
How Can Climate Affect Cure Times?
High humidity and cool temperatures extend cure windows. Plan accordingly to avoid tacky hardwood floors.
- Add 24–48 hours if indoor humidity exceeds 60 %.
- Avoid curing below 60 °F; lower temps slow polymer cross-linking.
- Use a dehumidifier in damp climates or run AC to keep relative humidity near 40–50 %.
- Fan placement: aim airflow across the floor, not directly into the finish, to speed evaporation without raising dust.
How Do You Keep Dust, Hair and Pets Off the Wet Finish?
During the critical cure phase, even a single hair can embed in the finish; a few precautions go a long way.
- Lay down sticky-tack mats at every entry and under tool trailers.
- Restrict pets and children from the work zone until rugs go down.
- Close doors and tape the bottom gap—airborne dust settles slowly but surely.
- Maintain low foot traffic paths with protective runners until final cure.
It’s best to stay outside your home after refinishing, but if that’s not possible, follow the timing guidelines above.
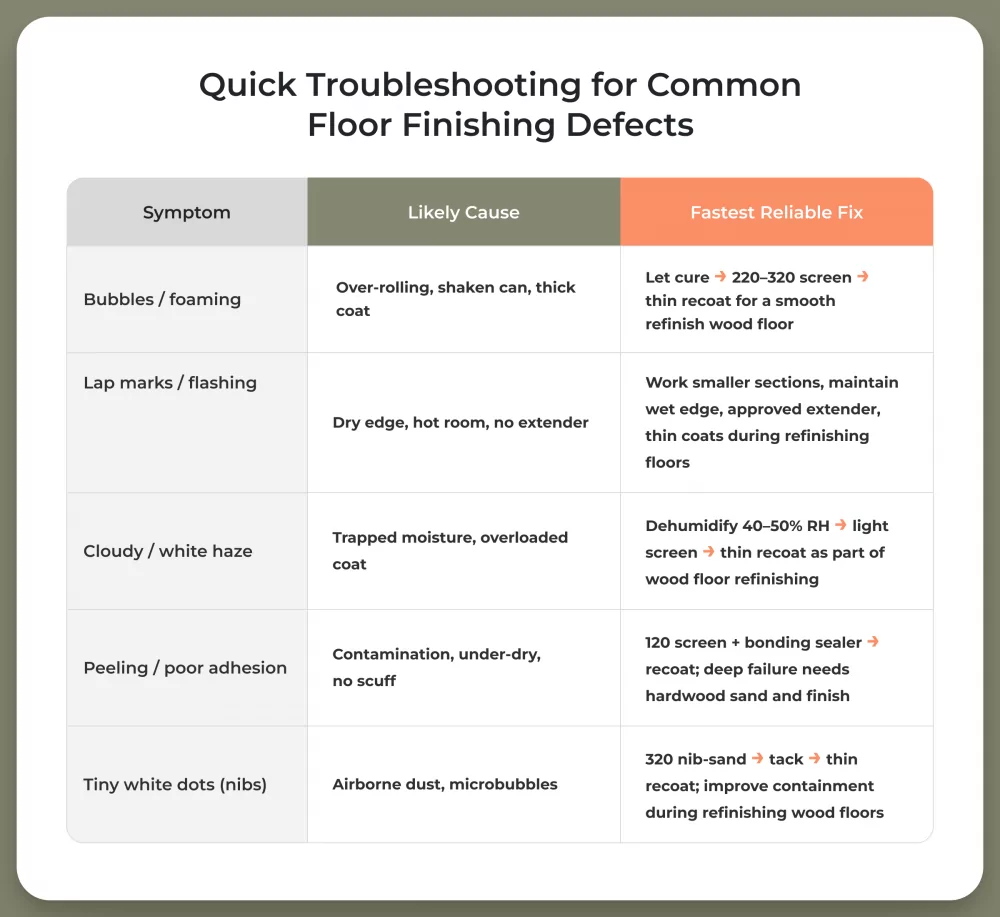
How Do You Fix Common Mistakes After the Finish Dries?
Most problems after floor finishing can be corrected without starting over; identify the cause, abrade locally, and rebuild thin, even coats so your hardwood floors look uniform again.
How Do I Get Rid of Bubbles or Lap Marks?
Bubbles and lap marks come from overworking the coat, rolling too fast, or thick application—level the surface and recoat in thin passes.
- Let the coat harden fully, then refinish wood floor locally: abrade with 220–320 mesh, vacuum, tack, and reapply.
- Don’t shake cans; stir only. Maintain a wet edge and work sections you can finish in 2–3 minutes.
- Roll gently; avoid foaming. If allowed by the manufacturer, add a water-based extender to reduce flashing on refinishing hardwood floors.
Why Is My Finish Cloudy or Turning White?
Cloudiness (blush) signals moisture trapped in the film or an overloaded coat—dry it down and reapply thinner.
Drop indoor RH to 40–50% and give it 24–48 hours; if haze remains, screen with 220 and recoat.
Apply thinner coats with proper dry times; strong airflow across (not into) the surface helps wood floor refinishing cure evenly.
Can I Spot-Repair Dents, Gouges, or Pet-Urine Black Spots?
Yes—feather-sand, bleach if needed, recolor, then blend new film into the old.
- Mask off the board, feather with 80/100/120 grit, then oxalic-acid bleach for dark urine stains; rinse and neutralize per label.
- Re-stain to match and apply two thin coats, overlapping 6–8″ into the surrounding hardwood floor refinish area.
What If the Finish Peels or Won’t Adhere?
Peeling means contamination or poor intercoat adhesion—bond or start fresh, depending on depth.
If it sheds down to bare wood, do a localized wood floor sanding and rebuild finish; widespread failure needs a full floor refinish.
If it lifts only between coats, screen with 120, wipe clean, and use a manufacturer-approved bonding sealer before recoating during refinishing hardwood flooring.
How Do You Handle Special Cases During Hardwood Floor Refinishing?
Edge cases need a different plan so you don’t sand through veneers, cook wood over radiant heat, or create hazardous dust. Use the guidance below to refinish your hardwood floors safely and predictably.
Can You Refinish Engineered or Prefinished Hardwood Floors?
Yes—if the veneer is ≥ 2–3 mm you can do cautious wood floor sanding once; thinner veneers should get hardwood screening (screen-and-recoat), not a full cut.
- Engineered (≤ 2 mm veneer): avoid aggressive passes; stick to screen-and-recoat.
- Engineered (≥ 2–3 mm veneer): one conservative floor sanding and refinishing cycle is typically safe.
- Prefinished wood with aluminum-oxide: tougher film; expect slower removal and more abrasives. If you fully sand, micro-bevels will disappear—keep them only if you screen and topcoat.
How Should You Sand Parquet, Radiant-Heat Floors, or Thin Veneers?
Use lighter cuts and tighter climate control; heat and cross-grain patterns magnify mistakes.
- Parquet/herringbone: first pass at 45°, then with the pattern; finish by buffering to blend scratch directions.
- Radiant heat: turn heat off 24 h before, keep RH 40–50%, and bring heat back gradually after coats; avoid heavy, slow-dry films.
If your home was built before 1978, refinishing work must follow the EPA’s Renovation, Repair and Painting (RRP) Rule.

Repair
Should You DIY Hardwood Floor Refinishing or Hire a Pro?
The DIY vs pro choice is about risk, time, and wood thickness. DIY can cut costs on refinishing hardwood floors, but every mistake in wood floor sanding permanently removes material you can’t replace, and a redo doubles cure time.
When Does DIY Make Sense?
If you have time, patience, and basic tool skills, you can successfully refinish hardwood floors on straightforward projects.
- One or two rectangular rooms, ≤ 300–400 sq ft each
- Minimal repairs; no deep pet stains or loose boards
- Natural tone or a single test-proven wood stain color
- Flexible schedule for curing and ventilation
- Comfort using a drum sander and buffer for floor sanding and refinishing
When Is a Professional the Smarter Choice?
Pros bring leveling skill, dust control, and finish chemistry knowledge that protects the result of refinishing hardwood floors for years.
- Cupping, crowning, or subfloor issues you can’t correct
- Parquet or herringbone patterns; stairs or many doorways
- Prefinished aluminum-oxide coatings or thin engineered veneers
- “Must-be-perfect” color targets, bleaching, or water-popping plans
- Compressed timelines where one-day coats and clean rooms matter
If you decide the pro route is safer or faster, we’re happy to help. Big Bro Hardwood handles hardwood floor refinishing end-to-end—prep, wood floor sanding, color work, and durable topcoats—so you move back on schedule with no surprises.
What’s the Cost, Time, and Risk Difference?
Before you commit, compare the real trade-offs—cash, downtime, and redo risk—so your hardwood floor restoration fits your constraints.
| Factor | DIY | Pro |
|---|---|---|
| Typical out-of-pocket | Lower materials + rentals | Higher invoice, includes labor & gear |
| Total time to “furniture back” | 3–7 days (self-paced) | ~3 days (crew + controlled cure) |
| Dust & odor control | Basic containment | HEPA extraction, low-VOC workflows |
| Risk of waves/chatter, color mismatch | Higher without experience | Low; defects corrected on the fly |
| Best fit | Simple rooms, flexible schedule | Complex layouts, strict deadlines, premium finish goals |
Remember: if you clean your hardwood floors with care, you won’t need refinishing as often!
Final Thoughts
Good results with refinishing hardwood floors come from simple discipline: test the surface, plan the schedule, control dust, and follow the grit sequence. Choose a modern water-based polyurethane for most homes, apply thin coats, and respect cure windows so your floor finishing hardens properly.
For edge cases, adapt the cut or switch to hardwood screening instead of aggressive wood floor sanding. Do that, and your hardwood floor restoration will look clean, wear hard, and stay easy to maintain. We hope you found our article helpful!

Refinishing Services
frequently asked questions
How often should I refinish my hardwood floors?
Most hardwood floors need full refinishing every 7–10 years, depending on the level of foot traffic, the wood type, and the floor finish used. High-traffic areas like the dining room or hallway may need refinishing sooner.
Light maintenance and recoating (resurfacing hardwood floors) can extend the life of your flooring and delay the next refinishing project. You can schedule a free estimate, and we’ll tell you how often your floors need refinishing in each room.
How many times can a ¾-inch oak floor be sanded?
Usually 4–6 full wood floor sanding and refinishing cycles over its life when cuts are conservative and grits are sequenced correctly.
If your wood floors are heavily damaged, warped, or previously sanded multiple times, it might be time to replace them and install new hardwood floors. But for most cases, a hardwood floor refinishing is more affordable and preserves the original beauty of your old wood. It’s only a matter of how many times you can refinish your hardwood floors.
What is the average cost per sq ft in 2025?
The total cost of a floor refinishing project depends on the size (in square foot), floor condition, and type of finish.
DIY to refinish hardwood floors runs about $2.50–$4.00 per square foot (materials + rentals); pro hardwood floor refinishing is typically $3–$8.00 per square foot with standard two-coat water based polyurethane.
Is water-based polyurethane as durable as oil-based?
Yes—modern water based polyurethane matches oil based finishes for wear, with less yellowing and faster recoat; choose pro-grade (2-component) for heavy traffic.
Can I refinish my hardwood floors without sanding them?
If the finish is intact, a hardwood screening (120-grit screen + two coats) works; grey bare wood or deep damage requires full wood floor sanding.
How soon can kids or pets walk on the new finish?
With water based polyurethane: socks in 4–6 hours, pets after 24–48 hours; with oil-based: socks at ~24 hours, pets around 72 hours (longer for large dogs).
Do I really have to sand between coats?
Generally yes—light scuff with 220-grit or a maroon pad unless the product allows a no-sand recoat within its window during refinishing hardwood floors.
Does refinishing raise home resale value?
Yes—freshly refinished wood floors photograph better, eliminate buyer objections, and cost less than replacement, which helps listings sell faster and cleaner.
What finish works best over radiant-heat floors?
Thin-coat water based polyurethane is the safe default; apply light coats, ramp heat gradually, and hold RH near 40–50%. Avoid heavy build that can crack; some penetrating oils also perform well when maintained.
Overall rating
5

(1 vote(s))
Comments