
 5.0
5.0


Water Popping Wood Floors: Step-by-Step Guide
06/26/2025
Reading Time ~ 8 minutes

 Donatas

Table of Contents
What is Water Popping and Why is it Important?
As a flooring specialist at Big Bro Hardwood, customers often ask me, “What is water popping a floor?” or “Should you wet wood before staining?”
Here’s the simple answer:
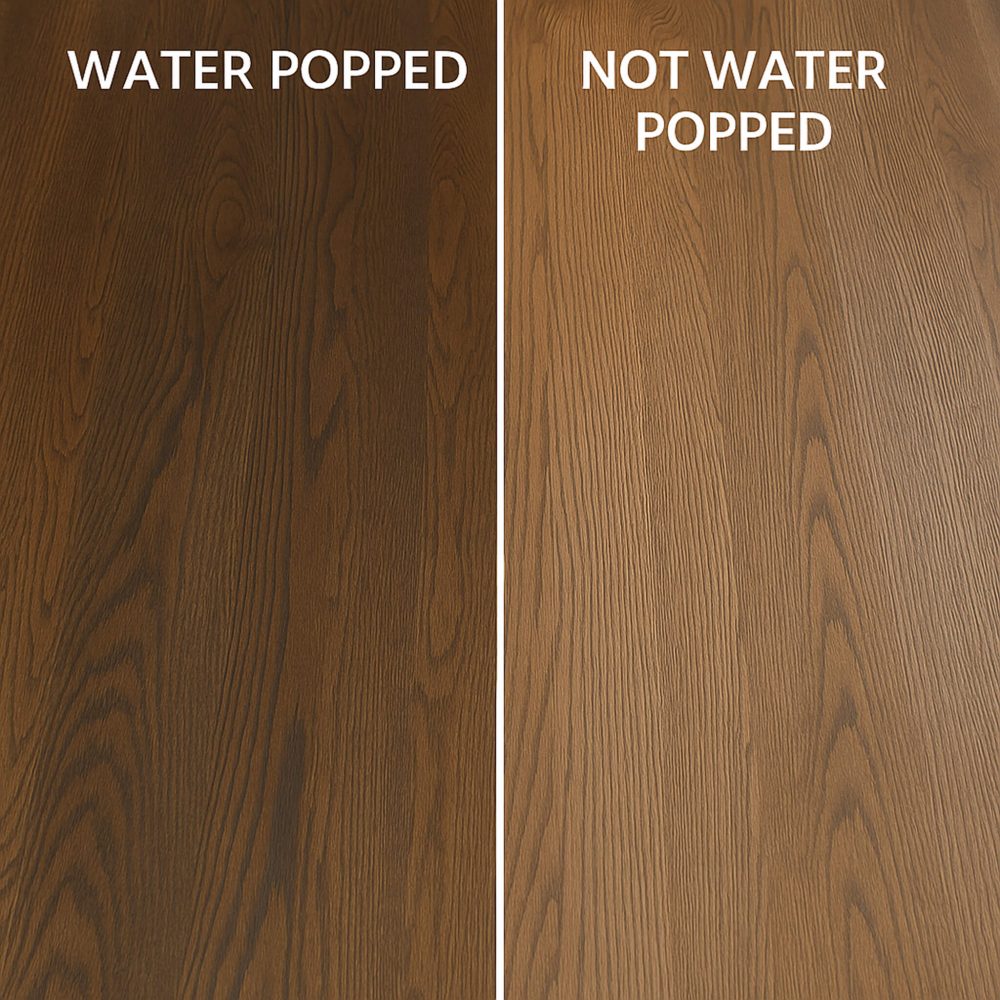
Water popping wood floors means lightly applying clean water to freshly sanded hardwood floors before staining. After sanding, floors become very smooth, but this closed grain prevents stain from penetrating evenly. By gently wetting wood before staining, the wood fibers swell slightly, opening the grain (grain pop). Refinishing is also easier after this process.
This process helps your wood floor stain penetrate deep, creating the dark rich color and uniform finish you’re after. Without it, the stain might turn out patchy or lighter than expected—often causing homeowners to have to re sand.
In this article, I’ll explain exactly how to water pop hardwood floors, when to do it, what tools you’ll need, and how to avoid common mistakes. I’ll also answer key questions like “How long to wait after water popping before staining?” to ensure you get professional results every time.
When to Water Pop Wood—and When to Skip It
Water popping isn’t always necessary, but in some cases, it can make a huge difference.
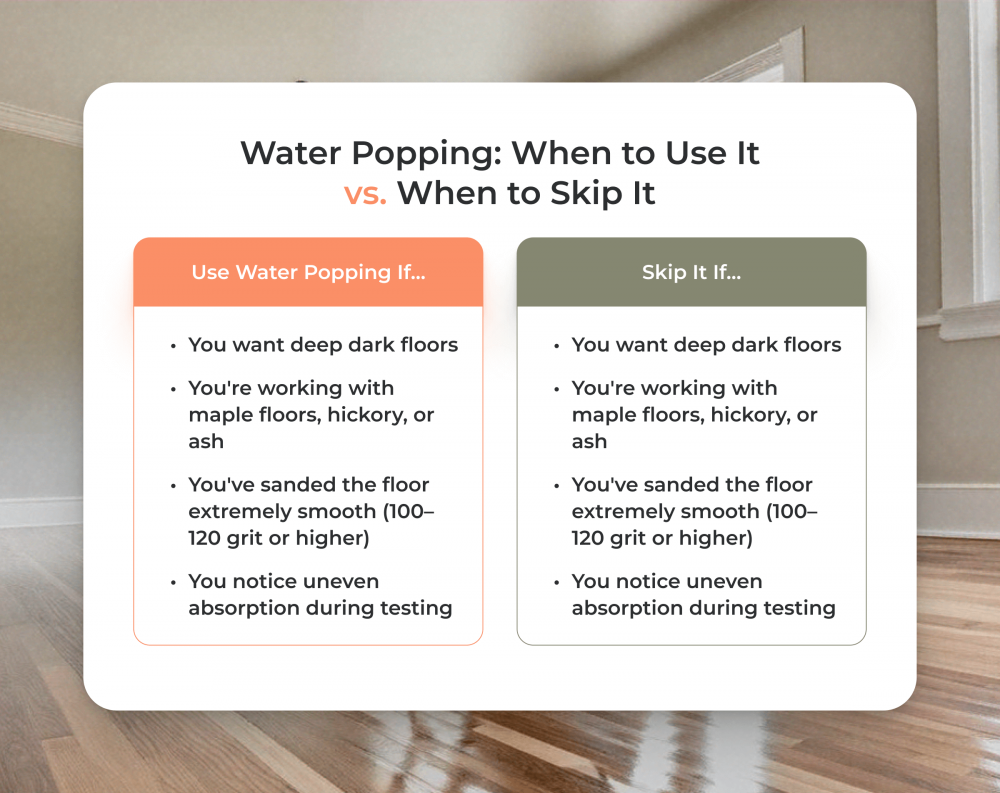
You Should Use the Water Popping Process if:
- You’re aiming for deep dark floors with rich, intense stain colors. The raised grain from water popping allows stains to penetrate deeply, giving your wood floor the exact dark shade you selected.
- You’re staining dense wood species such as maple floors, pine, or hickory. These species often stain unevenly and result in a blotchy floor. The water popping process evens out absorption so your stain looks smooth and consistent.
- Your floor was sanded down to an extremely smooth finish (finer than 100–120 grit). When the grain is too tightly closed, stain won’t absorb evenly. In this case, wetting wood before staining is strongly recommended.
You Might Skip Water Popping if:
- You’re happy with the natural look of your floor and prefer a clear finish rather than a stain.
- The flooring has a thin veneer layer (under 2mm). Excess moisture can cause veneer edges to curl or warp.
- The relative humidity (moisture levels) in your home are higher than 60%. In such environments, drying takes significantly longer, and water popping becomes less predictable, risking issues like wood floor popping up or warping.
Key Benefits of Water Popping
Many customers ask me about water popping vs not. As one of many flooring professionals who’ve seen both methods, I can confidently say that properly done, the water popping process provides significant benefits:
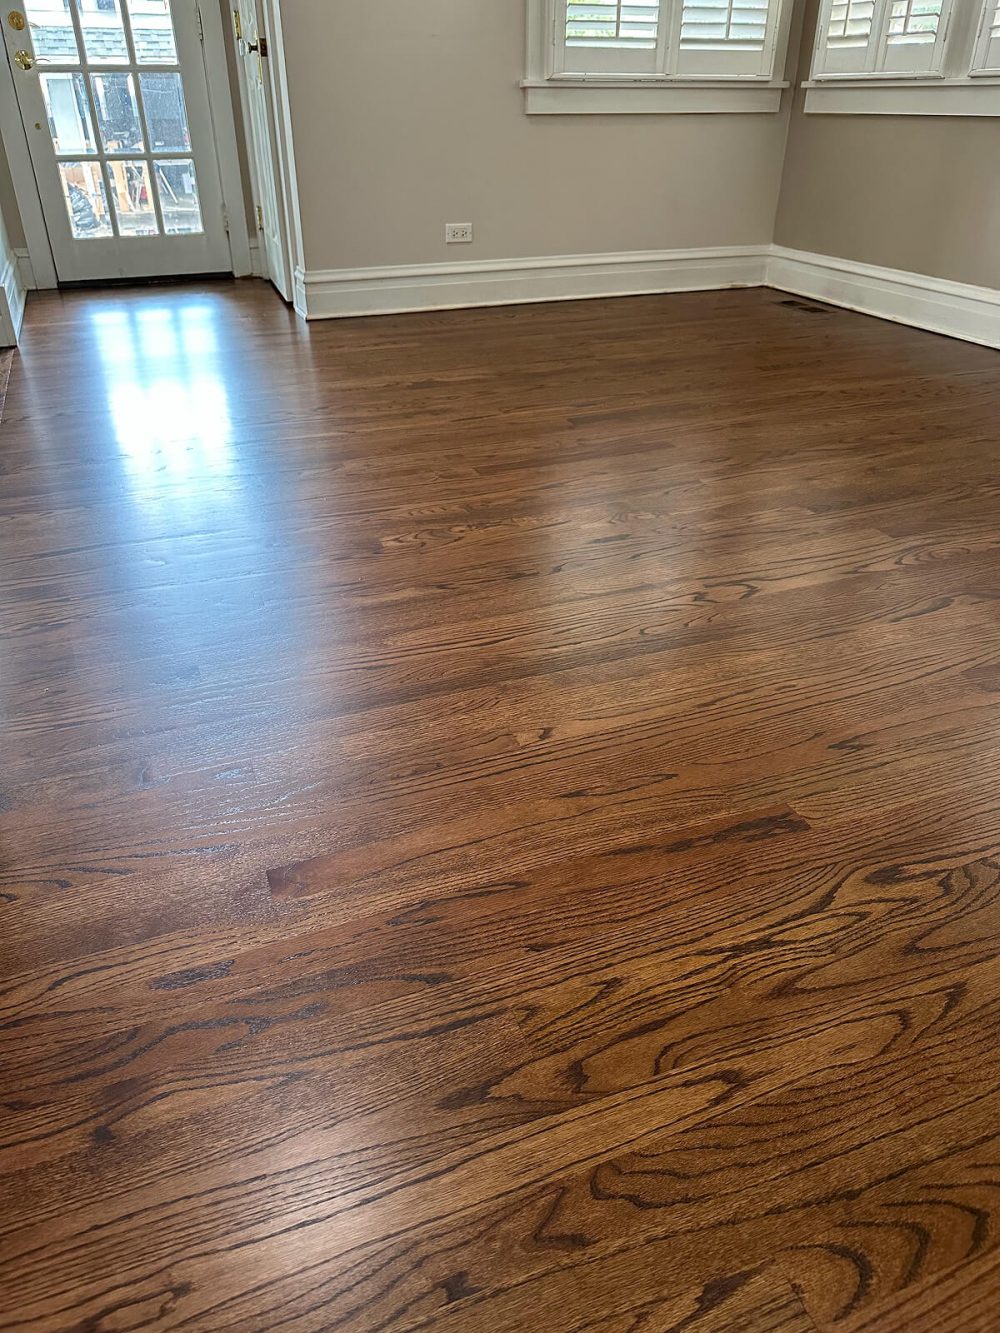
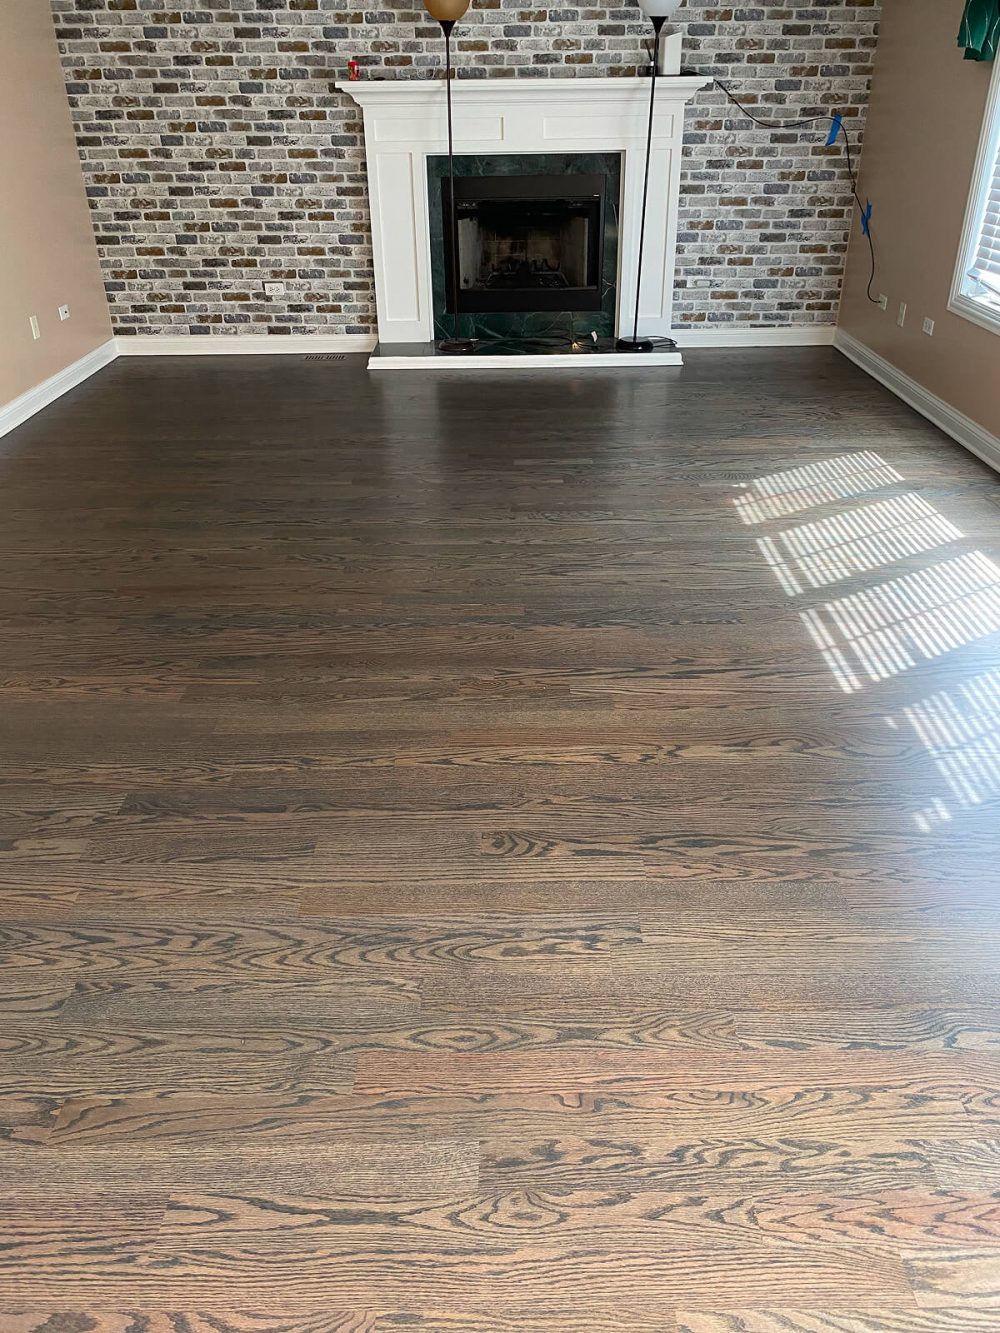
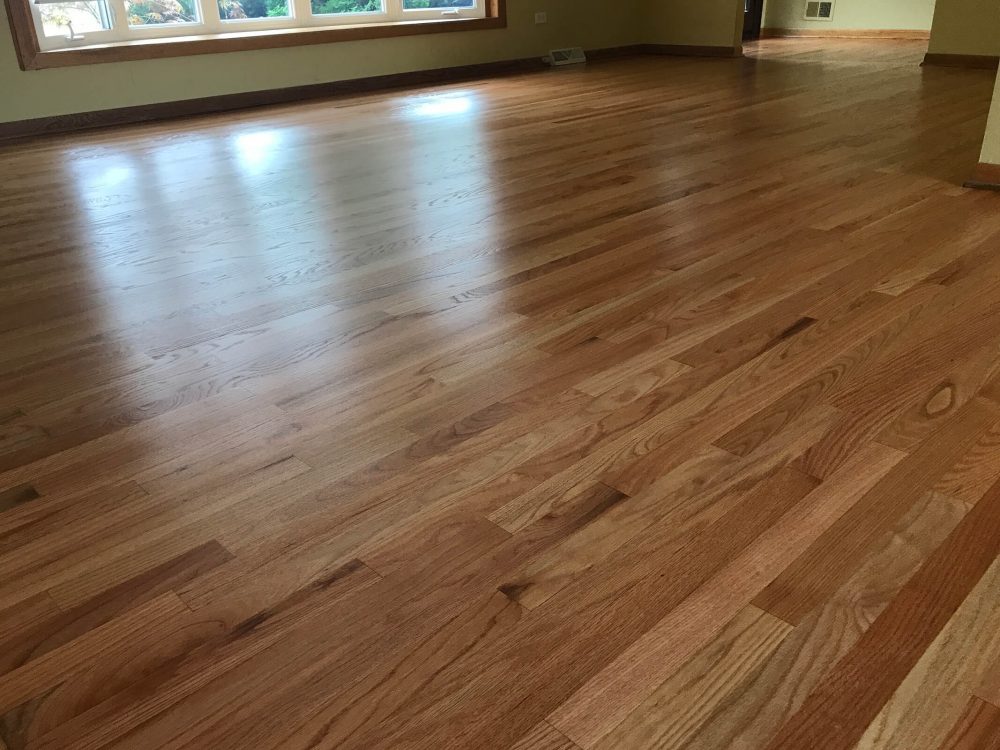
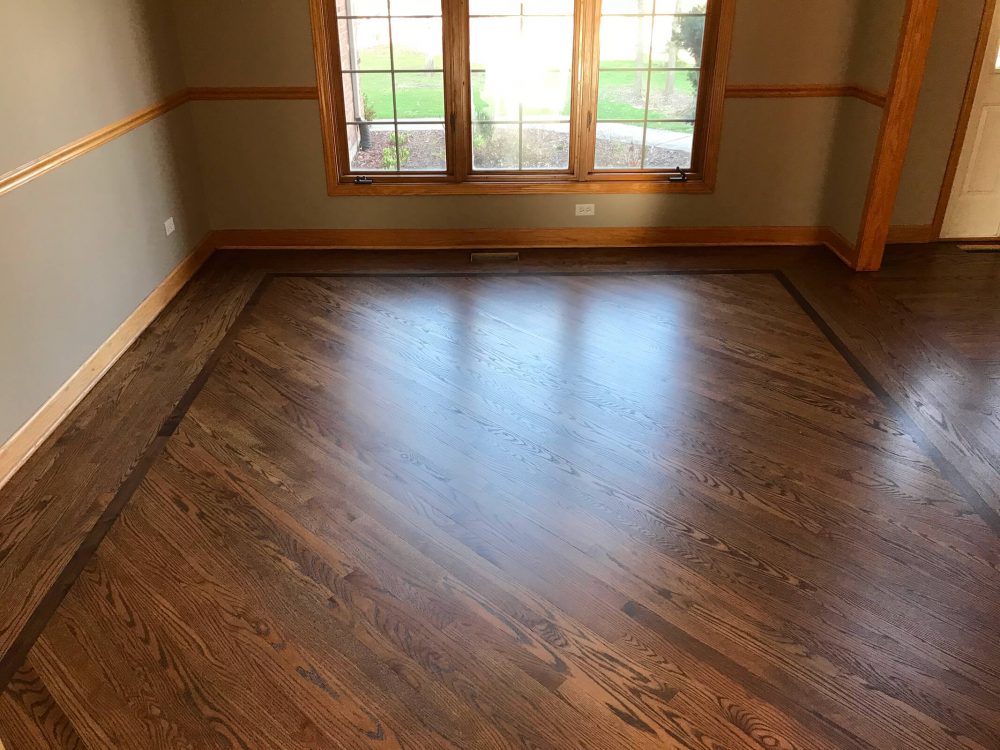
Deeper, Richer Stain Colors
By opening the grain, stain pigments penetrate deep, giving your floors a dark rich color that matches your expectations. Without water popping, stain colors often appear lighter than intended.
Uniform, Even Stain Absorption
Wetting wood before staining makes sure the whole floor evenly absorbs the stain. This prevents uneven patches or a blotchy floor, a common issue with closed-grain surfaces.
Minimizes Sanding Marks and Imperfections
Tiny sanding marks or swirl marks left from a very aggressive edger become far less noticeable after water popping. The raised grain helps disguise these small imperfections, ensuring a professional finish.
Stronger, More Durable Finish
When you water pop wood, the finish soaks deeper into the open wood fibers, creating a stronger bond and longer-lasting protection compared to applying finish (refinishing) over an extremely smooth, closed-grain surface.

Hardwood Floor Staining
Tools & Preparation Checklist for Water Popping Floors
Before starting the water popping process, having the right tools on hand is important.
Tools & Supplies:
- Garden type sprayer (highly recommended for even coverage)
- T-bar (to help spread water and prevent puddles)
- Purified water or distilled water (avoid tap water, which can react poorly with the stain
- Clean rags or a damp rag (for any excess water or spot-leveling)
- Moisture meter (to accurately track moisture levels and determine when floors are completely dry)
- Floor fans or air movers (good air circulation speeds drying and prevents moisture-related issues
- Carpet pad (a clean, lightly soaked carpet pad attached to a buffer can help evenly distribute water)
Quick Pre-Water Popping Checklist:
- Vacuum the entire floor thoroughly.
- Tack floor with microfiber cloth to remove fine dust.
- Check and record the baseline moisture content of your wood floor.
- Prepare workspace—cover walls and baseboards if necessary.
- Ensure proper ventilation and stable humidity (ideally between 40%–50%) for smooth drying.
By preparing well with these tools and steps, you’ll set yourself up for successful water popping, without surprises along the way.
How to Water Pop Wood Floors in 5 Simple Steps
As a specialist from Big Bro Hardwood, I’ve helped many homeowners through the water popping process. Here’s exactly how to water pop wood the right way, step-by-step:
Step 1: Sand and Clean the Floor
- Sand your entire floor to 100–120 grit until extremely smooth.
- Carefully vacuum up dust and then clean with a microfiber wet mop to make sure no dust remains.
Pro tip: Always perform a quick pre stain test on a small hidden area or scrap wood. It helps verify that the final stain color matches your expectations.
Step 2: Check Baseline Moisture
- Using a reliable moisture meter, measure and record the baseline moisture content. You’ll reference this number later to know when the floor is completely dry and ready for stain.
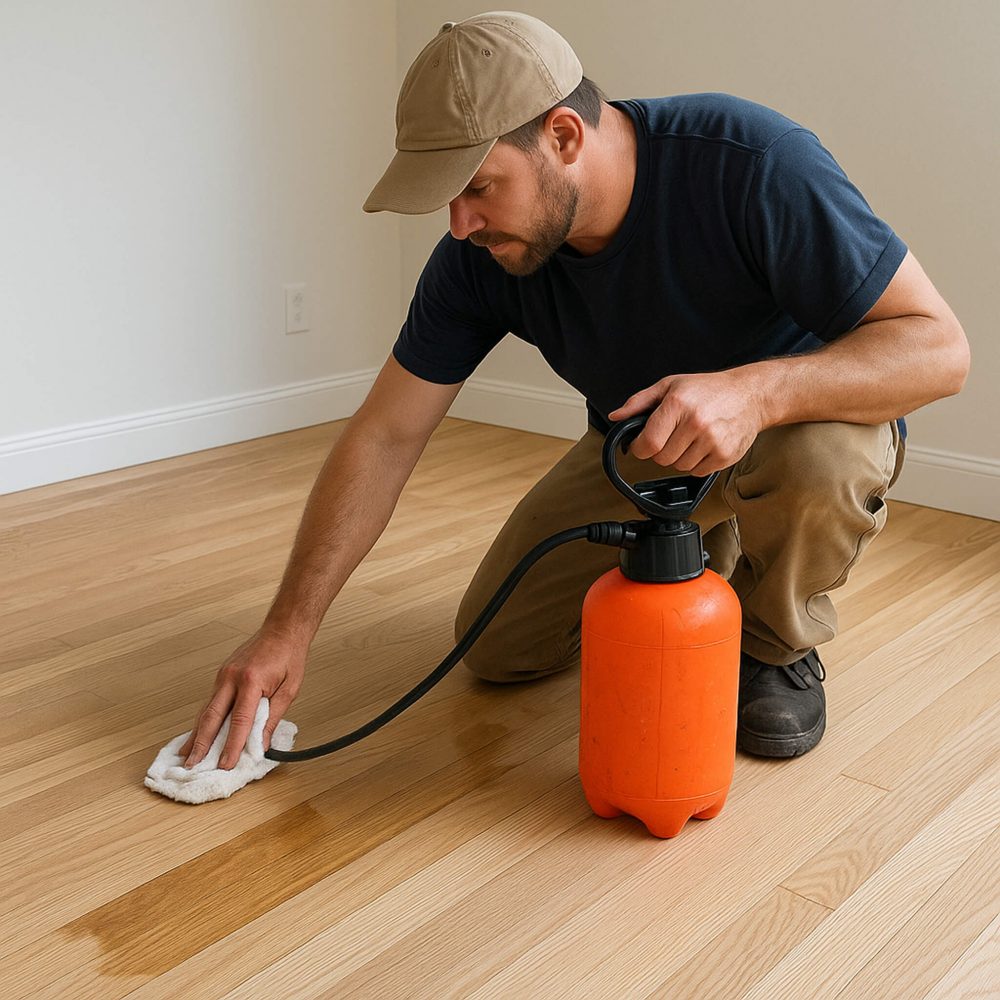
Step 3: Apply Water Evenly
- Fill your garden type sprayer with clean, purified water (avoid tap water).
- Spray a fine mist of water evenly across the surface in sections about two feet wide. Use a T-bar or clean rags to evenly spread the water, ensuring no puddles form.
- Consistency is critical—uneven water application leads directly to a blotchy floor during the staining process.
Always use purified water or distilled water, as chemicals or minerals from tap water can react negatively with certain wood stains or cause discoloration.
Step 4: Allow the Floor to Dry
- Let your floor dry thoroughly (typically 2–4 hours). Improve air circulation by placing fans. A quicker drying time reduces the risk of uneven results and speeds up your project. The drying time varies slightly based on humidity, indoor air quality, temperature, and wood type.
- Check periodically using a moisture meter. Your floors are ready when moisture returns to the recorded baseline, usually within ±2%.
Important: Do not sand after water popping. If the grain feels overly rough, a very light buff with a 180-grit screen is acceptable, but avoid heavy sanding which closes the grain again.
Step 5: Stain the Floor Promptly
- Apply your stain within about 8 hours of the floor becoming completely dry. This guarantees maximum penetration and the best stain color results.
- Be careful when walking on the water popped floor—it’s a delicate surface. Wear only socks to avoid creating scuff marks from misplaced shoe movement.
For faster drying, some pros mix water 50/50 with denatured alcohol. It’s effective, but only recommended once you’re comfortable with standard water popping.
Common Mistakes When Water Popping Hardwood Floors
After years of experience, I’ve learned exactly what to avoid to make sure the best results when you water pop wood. Here are some tips that can help you with your project:
- Uneven Water Application: Failing to spread water evenly across the floor will result in blotchy or uneven stain absorption. Always use a T-bar, garden type sprayer, or clean rags to fix this.
- Rushing the Drying Process: Staining before the floor is completely dry leads to uneven results. Always verify dryness by using a moisture meter against your recorded baseline moisture content.
- Walking on the Floor Prematurely: The newly water popped floor is an extremely delicate surface. Even slight scuff marks from shoes or careless movement can permanently affect stain absorption.
- Heavy Sanding After Water Popping: Avoid heavy sanding once you’ve completed the water popping process. Light buffing is acceptable, but aggressive sanding will undo your work and force you to re sand.
Need Professional Help with Your Hardwood Floors?
While water popping is straightforward, it does have many failure points—especially on challenging wood species or thin veneer surfaces. If you’re feeling unsure or simply prefer leaving the job to trusted flooring professionals, we at Big Bro Hardwood are always ready to help.
Our team has mastered the art of achieving the perfect dark rich color, even finish, and long-lasting results. We know exactly how to water pop and stain hardwood floors and can expertly handle every step—from careful sanding to stain application.
Have questions or ready to get started? Feel free to reach out, and we’ll help turn your wood floor into something truly beautiful.
We hope this article helped you better understand the water popping process and gave you the confidence to get the best results on your next project.

Hardwood Floor Refinishing
frequently asked questions
What is water popping, exactly?
Water popping involves lightly wetting the hardwood floor after the sanding process. This raises the wood fibers, opening the grain so the wood can accept stain evenly and deeply, creating a dark rich color.
How long to wait after water popping before staining?
Typically, you should wait about 2–4 hours. The drying time depends on few factors like temperature, moisture levels, and air circulation. Always confirm the floor is completely dry by using a moisture meter.
Do I need to sand after water popping?
Generally, you should not sand after water popping. Heavy sanding would close the grain again, preventing stain from penetrating properly. If the grain feels overly rough, gently buff once with a 180-grit screen or lightly use a wire brush, but nothing aggressive.
What happens if I apply too much water?
Applying too much water or failing to distribute water properly can result in a blotchy floor, causing the wood to stain differently. If this occurs, you’ll likely need to re sand the entire floor and restart the water popping process.
Does water popping work with all wood types?
Most wood species benefit, especially red oak floors, maple floors, ash, or hickory. However, use caution with engineered floors or those with a thin veneer, as excess moisture could damage this extremely delicate surface.
Overall rating
5

(2 vote(s))
Comments