
 5.0
5.0


Refinishing Oak Floors: From Fading Red Oak to Fresh White Oak
07/09/2025
Reading Time ~ 9 minutes

 Donatas

Table of Contents
- Why Refinishing Wasn’t an Option
- What the Oak Refinishing Project Involved
- How the Oak Wood Floors Were Transformed
- What Unexpected Issues Came Up — and How We Solved Them
- Refinished Floors, Transformed Home — The Final Result
- Project At a Glance
- How to Keep White Oak Floors Looking Fresh
- Final Thoughts
Some floors just reach their limit — and this 100-year-old home in Downers Grove made that loud and clear.
When a young family purchased the house in January 2025, they knew right away the original hardwood floors needed attention. The pinkish tint of the aging red oak wasn’t their style, and the finish had clearly seen better decades. Their hope? A quick sanding and a fresh matte coat to bring things back to life.
But the moment we stepped in, it was obvious: this wasn’t going to be a simple refinish job.
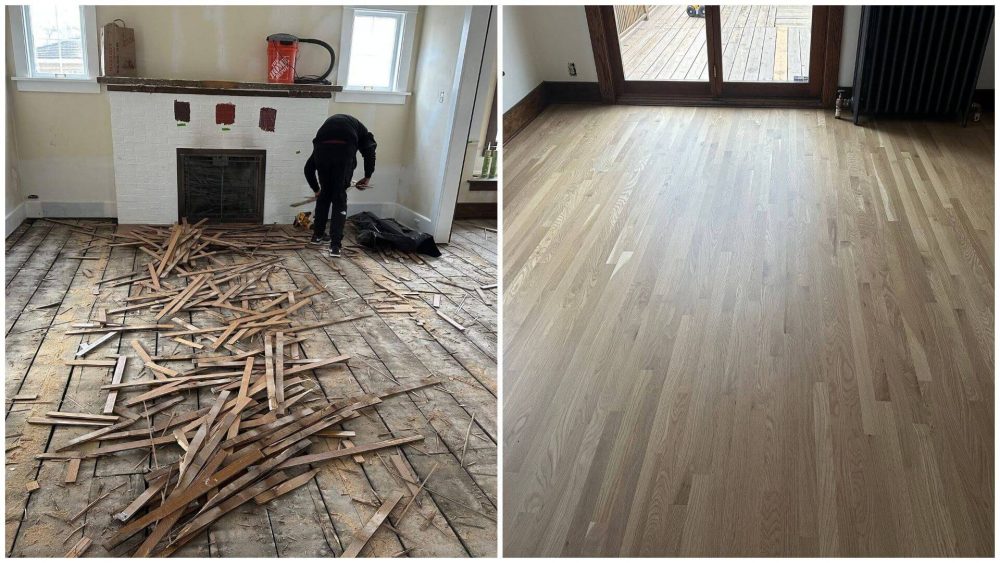
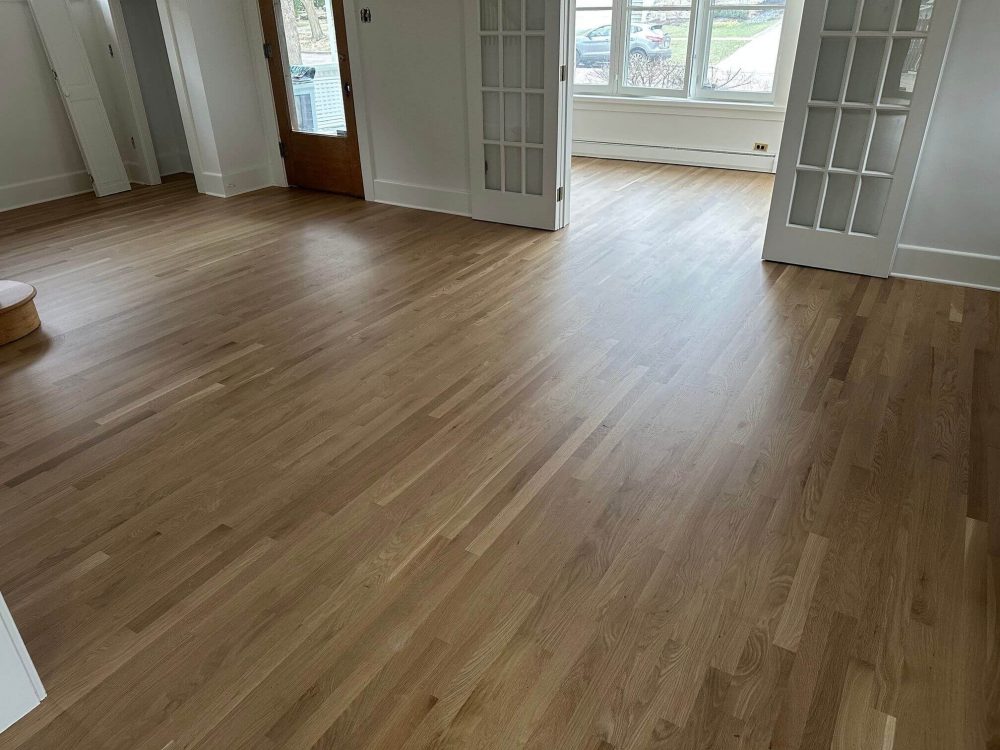
Refinished oak floors before and after — from worn red oak to bright, natural white oak.
Why Refinishing Wasn’t an Option
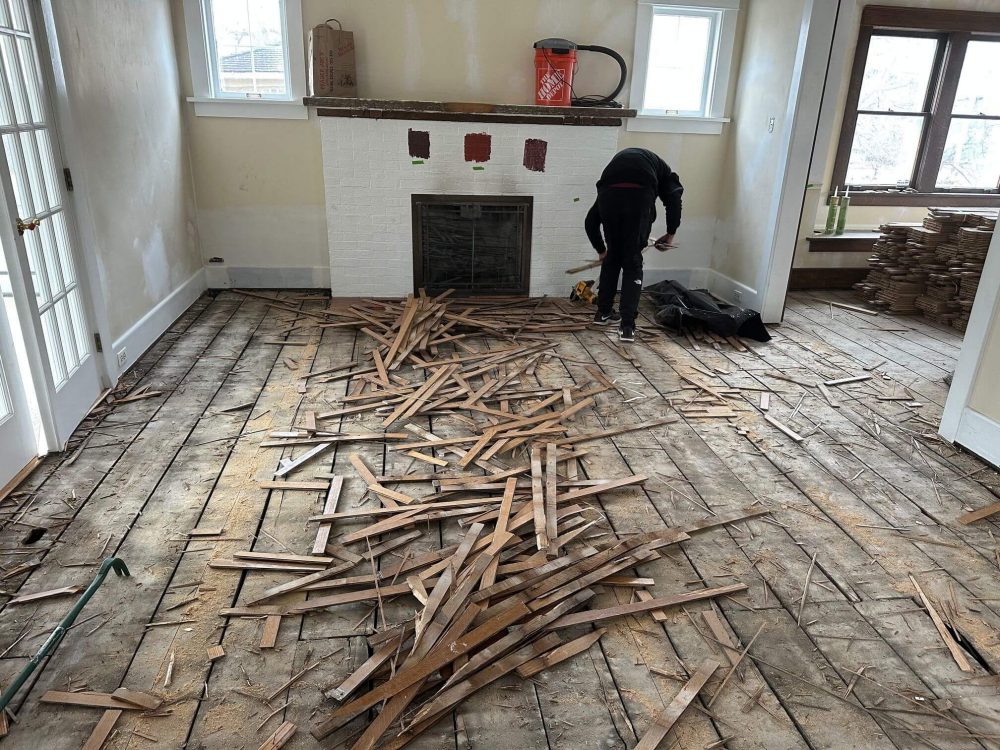
At first glance, the red oak floors looked like typical candidates for sanding — worn but salvageable. But once we set up for a test sand, the truth came out fast.
The boards had already been refinished one too many times over the decades. The wear layer was dangerously thin — in some spots, less than 1/8″. A few planks were already cracking at the seams. Attempting to sand them again wouldn’t just risk damage — it could destroy the floor entirely.
We walked the homeowners through the findings, and they made a smart call: rather than patch or gamble on a weak foundation, they chose to invest in fully replacing the floors. And they didn’t just replace — they upgraded. Out went the old red oak. In came brand-new white oak flooring, chosen specifically for its clean, neutral tone and long-term durability.
No more pink. No more patch jobs. Just a fresh start, built right.
What the Oak Refinishing Project Involved
What started as a small wood floor refinishing job quickly turned into a full-scope floor overhaul. Once the decision was made to replace instead of refinishing old hardwood floors, our team got to work — not just swapping boards, but restoring the home’s entire foundation for clean, long-lasting results.
Here’s what we tackled across both floors:
- Full removal of the original hardwood flooring (1st and 2nd floors)
- Temporary removal and later reinstallation of old-style radiators
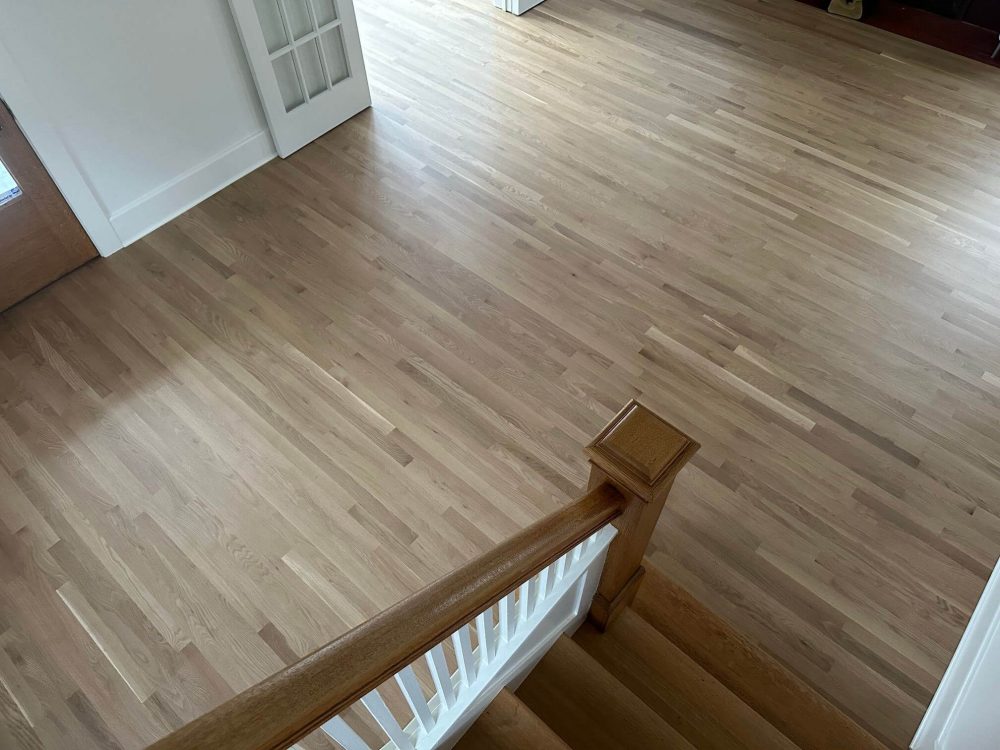
- Installation of brand-new white oak hardwood flooring throughout
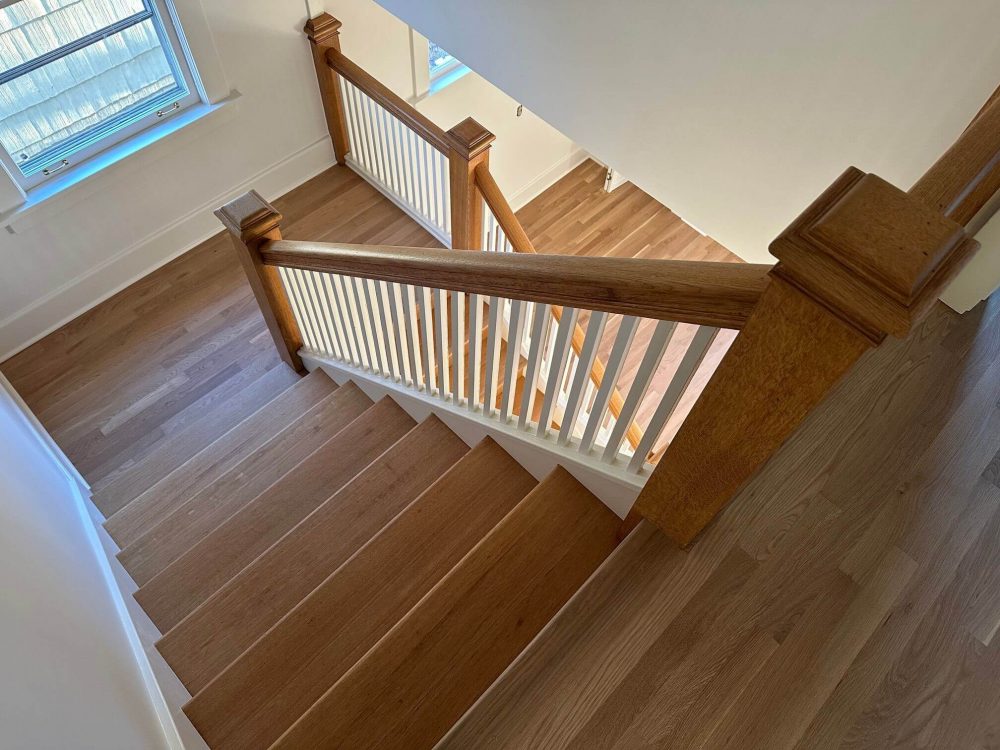
- Stair tread repair and sanding for a cohesive flow
- Refinishing of existing handrails to match the new tone
- Base shoe (quarter round) replacement along all walls and trim
- Three clear coats of Loba 2K Invisible Protect Ultra-Matte finish — no stain, just a raw, natural white oak look
- The entire project took just 14 days from start to finish
How the Oak Wood Floors Were Transformed
After removing the red oak from the plan, we rebuilt the flooring system from the ground up — literally. Below is a breakdown of the four key phases that brought this Downers Grove home into its next century of life.
Phase 1: Why the Original Red Oak Floors Had to Be Removed
Timeline: Days 1–3
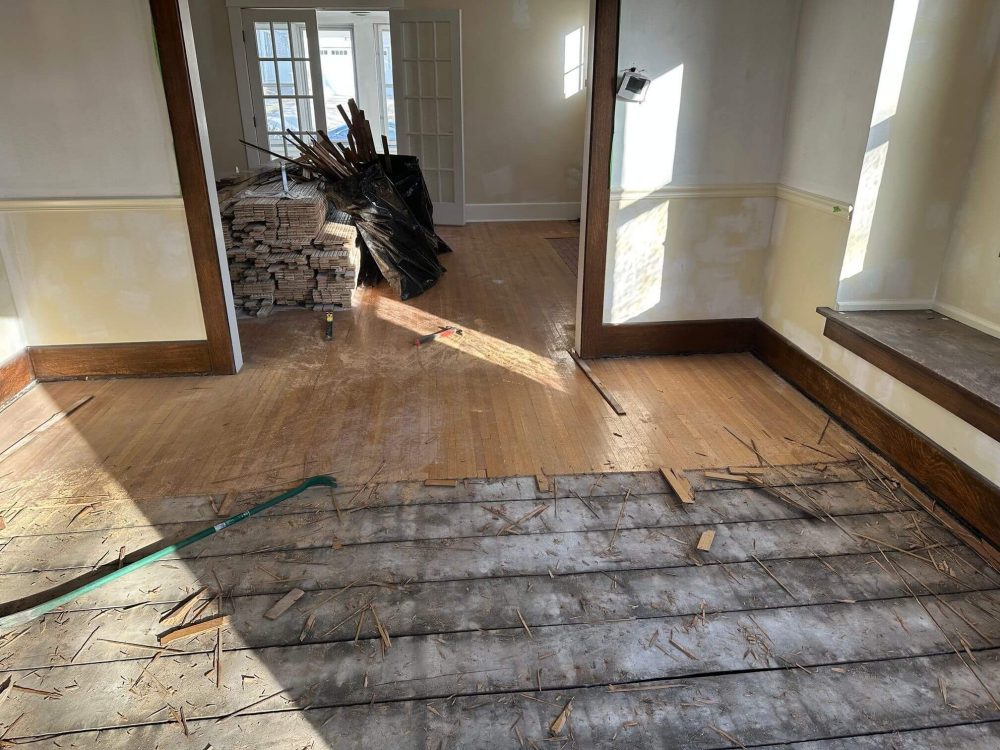
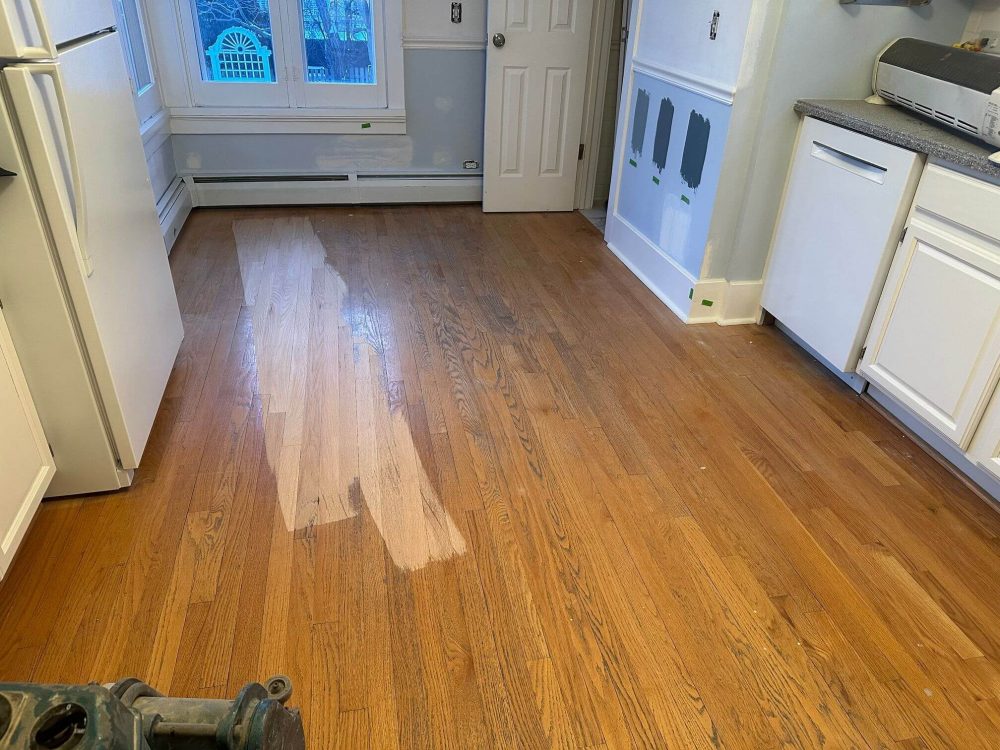
We began by removing all existing hardwood on the first and second floors. The red oak had been sanded multiple times over its lifetime — most planks had less than 1/8″ of usable wood left. Several boards had cracked at the tongue or splintered under slight pressure.
Our team worked room by room to avoid damaging trim or wall finishes. Radiators were disconnected and marked for later reinstall. Subfloors were swept, vacuumed, and tested for flatness and moisture (all readings < 12%, ideal for solid wood).
Phase 2: Subfloor Prep, Radiator Planning, and Layout Mapping
Timeline: Days 4–5
Before installation, we corrected several structural irregularities. A persistent low spot near the front fireplace was shimmed using custom-cut Baltic birch wedges. Loose subfloor panels were screwed down with 2½″ wood screws every 12″ to eliminate future squeaks.
We rechecked radiator valve placement to ensure future fit and airflow. Then, we laid rosin paper over 15-lb felt paper for dual vapor and noise control. Using a centerline system, we chalked layout guides across each floor to ensure uniform board alignment and visual flow between rooms.
Phase 3: Installing White Oak Hardwood for a Seamless Flow
Timeline: Days 6–10
We installed 2¼″ white oak select-grade planks with a natural, low-variation grain. Each board was fastened using a 15-gauge pneumatic floor nailer, driven every 8–10″ along the tongue to minimize flex and creaking. End joints were staggered across ≥ 6″ for structural stability and visual continuity.
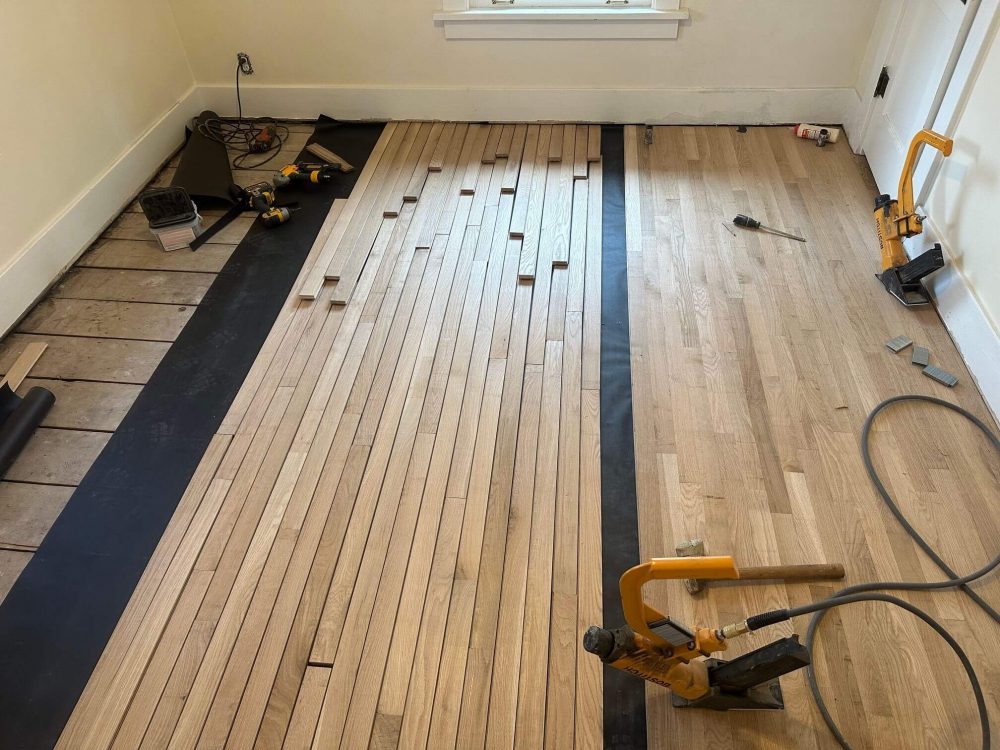
For challenging zones like radiator cutouts and tight stair landings, boards were hand-cut with precision using an oscillating multi-tool. We matched the direction of new boards with original plank orientation to preserve the home’s historic flow. All stair treads were patched, leveled, and integrated into the main install line.
Phase 4: Sanding & Finishing with Loba 2K Invisible for a Natural Look
Timeline: Days 11–14
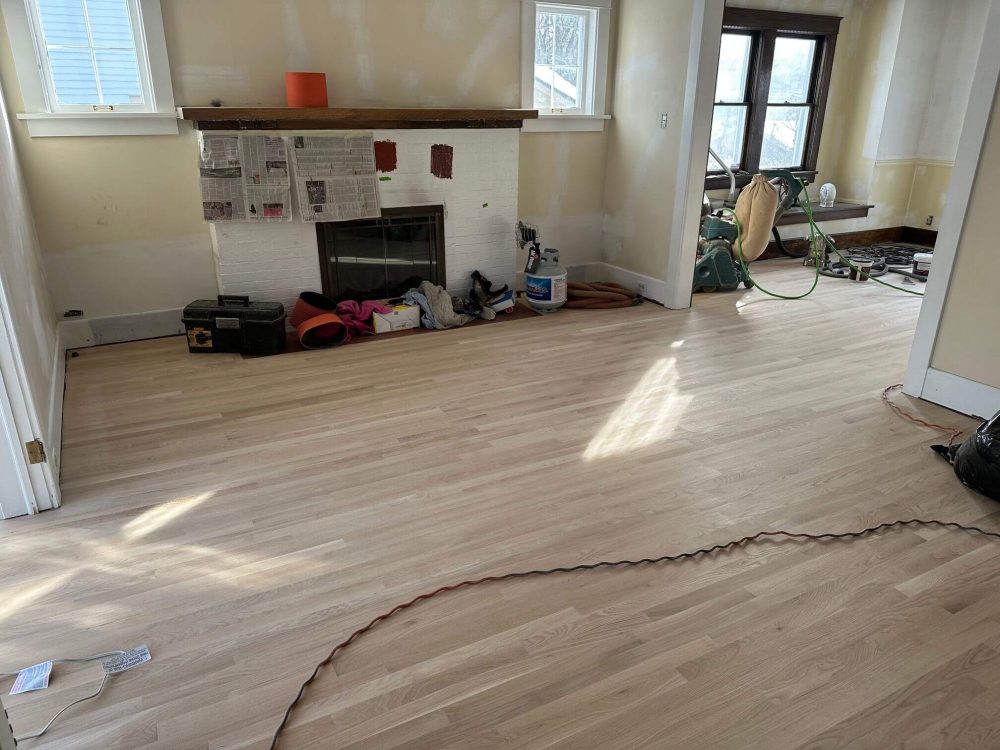
Once installed, the new floors were sanded in three progressive passes:
- First pass – 40-grit: removes mill glaze and micro-level unevenness
- Second pass – 80-grit: smooths the surface
- Final pass – 120-grit + orbital edge blend
No stain was applied — instead, we sealed the raw white oak using three coats of Loba 2K Invisible Protect Ultra-Matte. This water-based finish preserves the natural tone and grain with zero added sheen or ambering. We maintained indoor humidity between 35–40% using portable humidifiers to ensure proper curing.
The final result: a clean, smooth finish that looks like raw wood — but holds up like a high-performance floor.
What Unexpected Issues Came Up — and How We Solved Them
Old homes don’t always follow the rules, and this one gave us a few surprises. Here are three issues that came up mid-project — and how we handled them without compromising timeline or quality.
Fireplace Dip in the Subfloor — Corrected with Custom Shims
While leveling the first-floor subfloor, we found a ⅜″ dip near the fireplace hearth — enough to cause bounce and cupping later. Our team custom-cut birch plywood shims to fill the depression, secured with construction adhesive and screws. We verified flatness with a 6-ft aluminum straightedge before laying any boards.
Out-of-Level Stair Stringers — Fixed with Angle Blocks
Two stair stringers were leaning slightly forward, likely from past moisture exposure. This would have caused the new treads to sit unevenly. Instead of rebuilding the entire staircase, we fabricated angle-correcting wedge blocks to realign the tread base, saving time and preserving original trim.
Low Indoor Humidity — Managed to Protect the Finish
February air in Chicagoland is notoriously dry, and this home measured just 18% humidity when we started. That’s far too low for white oak installation and finishing. We brought in commercial-grade humidifiers to stabilize indoor levels between 35–40% before applying any finish. Without this step, the topcoat could’ve cracked or separated over time.
These kinds of details may not be visible in the final photos — but they’re exactly what makes the results last.
Refinished Floors, Transformed Home — The Final Result
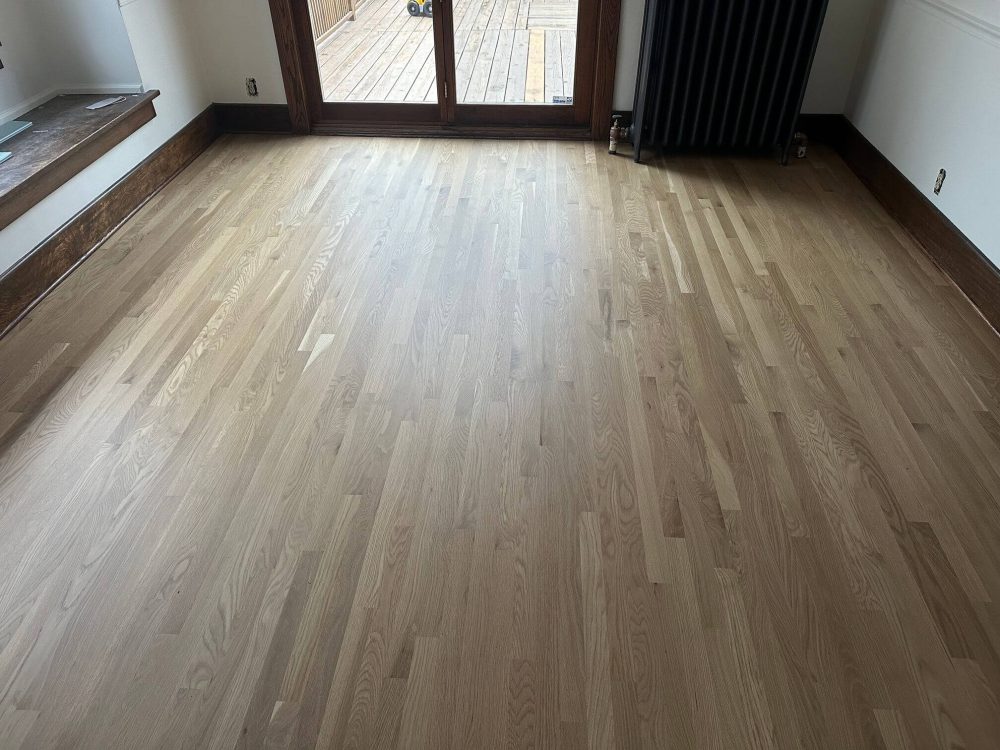
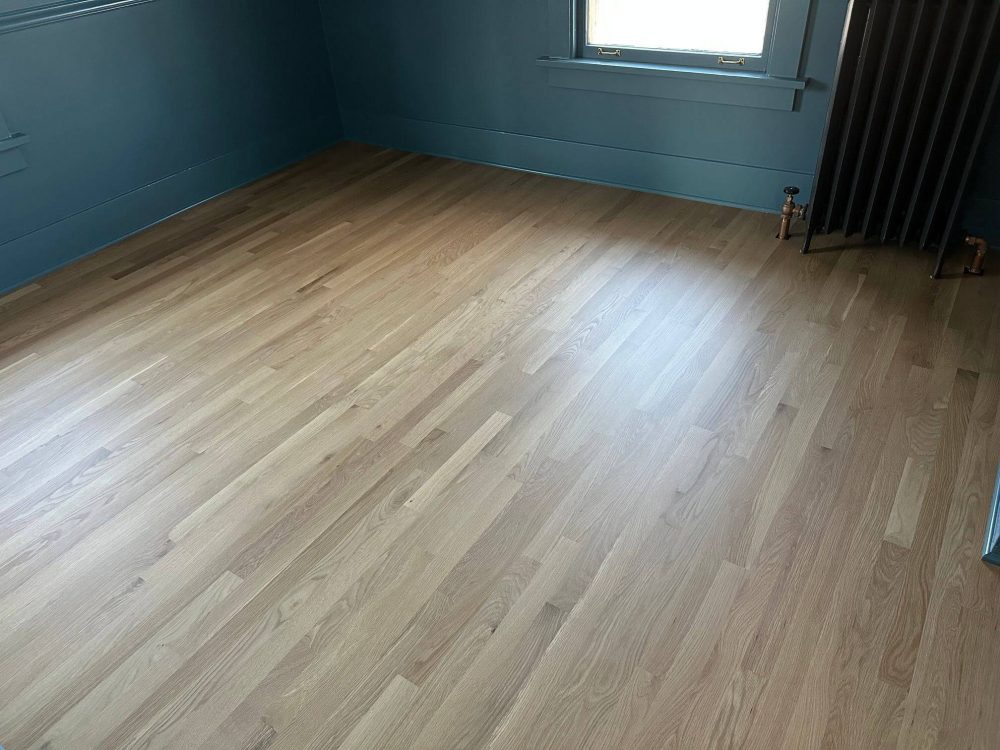
By the time we finished, the entire feel of the home had shifted. Gone were the tired, orange-toned red oak floors — replaced by a clean, bright surface that made the historic charm of the house stand out even more.
The ultra-matte finish on the new white oak delivered exactly what the clients wanted: a raw wood look without the shine or yellowing. No stain, no gloss — just the natural beauty of oak, protected for decades to come.
“It feels like the house dropped 50 years of wear overnight,” the homeowner told us during the final walkthrough. “And the best part is… no more pink floors.”
Every room now flows seamlessly into the next. The stairs, handrails, and even the tight corners all blend into a unified, timeless finish. It’s a result that couldn’t have been achieved by simply refinishing what was there — and it shows.
This wasn’t just oak floor refinishing. It was a full reset — and the before-and-after speaks for itself.
Project At a Glance
| Metric | Details |
| Location | Downers Grove, IL |
| Home Age | ~100 years |
| Previous Flooring | Refinished red oak (beyond repair) |
| New Flooring Installed | Solid white oak, 2¼″ select-grade |
| Finish Used | Loba 2K Invisible Protect Ultra-Matte (3 coats, no stain) |
| Total Area | ~1,850 sq ft across 1st and 2nd floors |
| Stairs & Handrails | Repaired and refinished to match |
| Radiator Work | Full removal and reinstallation during project |
| Crew Size | 4 flooring professionals |
| Project Duration | 14 calendar days |
| Final Look | Natural white oak, ultra-matte, seamless flow |
| Main Goal Achieved | Replaced aging red oak with clean, modern white oak floors without pink tones |
How to Keep White Oak Floors Looking Fresh
While white oak is durable and forgiving, proper care is what makes a floor last. Here’s the simple care routine we recommended to the homeowners to help keep their new white oak floors looking clean and natural for years to come.
Weekly Care
- Dry mop or vacuum 2–3× a week using a microfiber pad or hardwood-safe vacuum (no beater bar).
- Spot clean spills immediately with a lightly damp microfiber cloth.
What to Avoid
- No steam mops. The high heat and moisture can damage the finish.
- No oil-based cleaners like Murphy’s Oil Soap — they leave residue and dull the matte finish.
- No excessive water. Damp, not wet, is the rule.
What We Recommend
- Use felt pads on all furniture legs — even under small pieces like stools and kid chairs.
- Bona or Loba cleaner sprays are ideal for occasional full cleanings.
- Keep humidity between 35–55% year-round to prevent gaps or cupping.
Following this routine will help preserve the raw, natural look of your refinished hardwood floors for many years — without needing another major project.
Final Thoughts — And What to Do If Your Floors Are Past Their Prime
Not every hardwood floor can be saved — and that’s okay.
In this project, refinishing wasn’t an option. The original red oak was worn down to the point of failure. But by replacing it with new white oak flooring and a natural, ultra-matte finish, we gave the home a clean slate — one that respected its history while elevating every single room.
Sometimes, the best thing you can do for an old floor is retire it with dignity and build something better in its place.
If your floors are beyond sanding — or you’re just ready for something brighter, stronger, and built to last — we’d be happy to help you with professional hardwood floor installation.
Let’s talk about your options.

Hardwood Floor Refinishing
frequently asked questions
Can red oak floors be refinished to look like white oak?
Sometimes — but not always. Red oak has a natural pink undertone that can be tough to mask with light staining. In this project, the existing red oak was too worn down to refinish, so we replaced it with white oak for a cleaner, more neutral look.
What’s the best finish for a natural white oak look?
A water-based, ultra-matte finish like Loba 2K Invisible Protect keeps white oak looking raw and light, without adding shine or yellow tones. It’s ideal for clients who want the “bare wood” aesthetic with full protection.
Overall rating
4.8

(5 vote(s))
Comments