Flooring is one of the most important aspects of any interior design project as it forms the foundation of everything else in your home. In fact, it takes homeowners and interior designers a good amount of time to make the right flooring decisions. Apart from the type of flooring and the materials used, one also needs to consider whether it is durable and aesthetically appealing.
Why Hardwood Floors?
Hardwood is a popular choice for flooring among homeowners as it is long-lasting, functional, and holds aesthetic value. The best hardwood floors are usually strong and rigid to withstand all wear and tear.
The very thought of installing new hardwood floors is exciting as it gives a fresh look to your home interiors. Hardwood flooring adds a classy touch to your room and comes with warmth and value. The best thing about hardwood floors is that you can choose from a wide range of shades and styles.
Before starting with the installation or hardwood refinishing process, you are required to consider a few things to ensure that you are getting the best look for your room. For instance, you need to know which hardwood flooring color will match your home interiors the best or which installation method will be most suitable for your needs and budget.
In this article, we will discuss the best ways to choose and install hardwood floors as per your home decor and personal preferences. We will also talk about the popular types of hardwood floorings to help you make more informed decisions.
Types of Hardwood Floors
Some of the best species of hardwood floorings include maple, flooring, oak flooring, and cherry flooring. There are certain other hardwood species as well, such as walnut, bamboo, mahogany, hickory, and ash.
There are two broad classifications of hardwood floors – solid and engineered. While the former is used in traditional hardwood floors as it comes with solid wooden boards for high durability, the latter offers a more realistic look of the original hardwood species as it comes with more advanced application methods in a cost-effective way.
- Solid Hardwood Flooring: Solid hardwood floor is obtained from a single piece of wood and may cost you around $5 per square foot.
The benefits of using solid hardwood flooring are many. You can refinish them as many times as you wish. Since they are milled from one thick piece of wood, they are more durable and would last for decades.
Solid hardwood floors are designed to be installed on top of a wooden subfloor in which each board is nailed down to the underlayer after proper positioning. Solid hardwood floors require a good amount of nailing, which is why it is not suitable for installation on concrete bases.
- Engineered Hardwood Flooring: Engineered hardwood flooring, on the other hand, is made of multiple thin layers that consist of compressed wood, polymers, resin, and a top layer of real hardwood. Since the hardwood layer installed on top is thinner than that used in solid hardwood floors, the cost is much lower at around $3 or $4 per square foot.
The biggest advantage of engineered hardwood floors is that they can be installed on any kind of subfloors, including wood, linoleum, tiles, and even concrete.
Instead, they are grooved on the sides of various planks and are snapped together with the underlayers for a secured fitting. This is why it can be paired with any kind of layer without any fear of detachments or loose fittings.
Besides, the polymer and resin layers used underneath hardwood top layers are capable of withstanding high humidifier levels, thus preventing any “cupping”, swelling, or warping of hardwood floors. Engineered hardwood floors are installed with adequate expansion spaces around the edges, which is why they are less susceptible to swelling or gap formations. Even if they swell, the expansion spaces will allow these floors to stay in place and remain flat.
Engineered hardwood floors don’t require any finishing after the installation as they always come with high-quality finishings. This makes it a more cost-effective and smart choice.
In terms of hardwood floor finishings, we have two types – finished and unfinished flooring.
- Unfinished Hardwood Flooring: Solid hardwood flooring was traditionally installed unfinished, and therefore, the installer would take those extra steps to finish them after installation. Some steps involved in solid hardwood finishing include sanding, and the application of stains and a protective coat to give it a durable finish.
The installation process involved in unfinished hardwood floors is a smooth one as it is sanded after installation, thus removing any board-height discrepancies. Moreover, you can apply your desired shade after installation by applying a custom-mixed stain, which you can easily obtain from a paint store.
- Prefinished Hardwood Flooring: Today, hardwood floors are also available in prefinished products – the installer simply needs to place it firmly over a sublayer. No additional layer of finishing is required in that case. That’s why the process of installing a finished hardwood flooring is less time-consuming than an unfinished one.
Prefinished hardwood floorings are readily available in a variety of colors, and therefore, you don’t need any additional staining or finishing processes. Although it may involve higher material costs, the installation costs are much lower compared to unfinished hardwood floor installations.
And if you choose the right dealer for Hardwood Floor Installation in Orland Park, you can save a lot of money in the long run for prefinished hardwood floorings. Besides, you can also save a few bucks in cleaning the stubborn corners as prefinished hardwood floors have little to no exposure to toxic fumes, dust, and grime.
10 Tips to Choose and Install the Best Hardwood Floors
To ensure you have the best hardwood floors, here are some important tips to guide you throughout the hardwood installation or refinishing process.
1 Choose the Right Wooden Floor Species and Color
As mentioned above, there are many different species, types, finishings, and colors of hardwood floorings. Try to pick the most suitable one that matches and adds a balance to your room surroundings.
Depending on your needs and budget, you can go for either the solid hardwood floors or the engineered ones. Take into consideration various aspects like furniture types, shades, wall color palettes, and room themes before choosing any wood floor. You also need to decide what look you want for your room before buying any.
2 Acclimatize Your Wooden Floor
Acclimatizing is allowing your hardwood to adjust and get habituated to the surroundings of your property. As soon as your hardwood is delivered to your home or office, leave it for a while and let it adapt to your surrounding environment.
Since hardwood is a natural product, it will naturally contract or expand after a few days depending on the humidity levels and temperature of your location. This will definitely give your hardwood a new shape and size, thus enabling you to take the right measurements before installation.
Acclimatizing your hardwood will reduce the risks of damage right after installation, such as swelling, warping, gap formation, etc. To acclimatize your hardwood appropriately, you can follow these steps –
- Get your hardwood delivered much before the installation process.
- To acclimatize solid hardwood floors, it’s best to leave them for at least 7 days before the installation process.
- To acclimatize engineered wood floors, leave them for at least 72 hours before beginning the installation procedure.
- Keep your hardwood flooring away from any radiator or heater.
- Make sure the room is completely dry before getting the wood floors delivered. Never leave it on a damp floor or against wet walls to avoid unnecessary expansions.
- Leave the hardwood floors to acclimatize in the room it is going to be installed while still in their original packaging.
3 Hire the Right Professionals
Hiring the right hardwood floor installer is necessary to ensure the best services. Before choosing a company for Hardwood Floor Refinishing in Naperville or for installation purposes, ask them these key questions:
- Will they keep you updated on their work progress and set concrete deadlines?
- Will they explain all the procedures and installation methods followed and give you a clear rate chart or price break-up for the same?
- Will they schedule a visit to your installation area before the installation process to take the necessary measurements and plan the course of action?
- Will they offer the best solutions and fit them within your budget?
- Will they remove the furniture and other objects before starting the installation process?
- Will they remove any previous sublayers or flooring materials?
- Will they clean up the area before beginning the installation process?
- Will they offer you to move back the removed furniture once the installation is done?
- Will they offer cost-effective solutions and after-sale services?
While looking around for hardwood floor installers, it’s important to consider these questions to make the best decisions. You need to make sure that your installer is professional and takes all the necessary responsibilities to complete such an important project.
4 Use Only High-Quality Materials
By choosing top-quality materials, you can assure a durable, strong, and long-lasting hardwood floor for your room. The wood floors that last for decades will also increase the value of your property.
You may go for cheaper options, but make sure you are getting a good value for money here. It’s better not to compromise with the quality of materials used as it would save many more bucks in the long run.
5 Remove Furniture and Other Elements
Always clean your floors and your entire room prior to the hardwood installation process. A professional company for Hardwood Floor Refinishing in Orland Park will always offer to remove the furniture and other elements, followed by a thorough cleaning process of the area.
If they don’t offer room cleaning, you can hire a professional cleaning service to remove every dirt and debris stuck in the corners. Also, seal your doors and windows or any other openings to protect the other areas of your home.
6 Prepare Your Subfloors Before Installation
As already mentioned, you need to install your hardwood floors on a sublayer for better finishing and higher durability. Your underlying layers will be the base for your hardwood floors, and therefore, you need to do that correctly. A professional hardwood floor company will always take care of your sublayer and put more effort and time to prepare a solid foundation.
Check whether your sublayer is flat, clean, and dry before beginning the hardwood installation methods. You can also use a spirit level to ensure your sublayer is level and flat. Also, use a Moisture Meter to check the moisture levels of your sublayers prior to installation.
Go ahead with the installation only if the MC (Moisture Content) is 16% or lower (for wooden subfloor) or under 6% (for concrete subfloor). If you feel your sublayer is not dry enough, allow it more time to naturally dry out before proceeding with the installation.
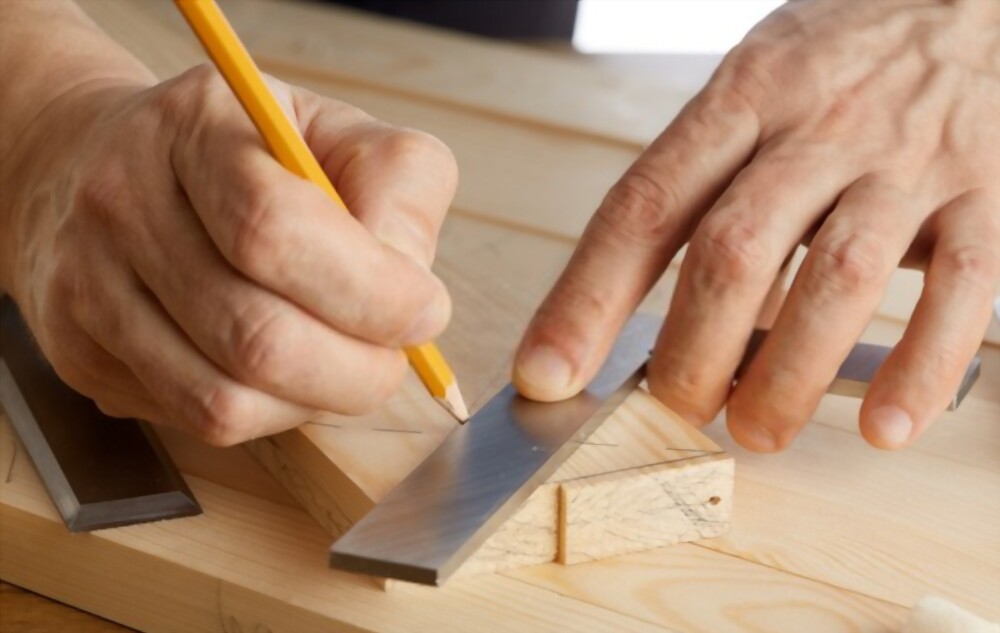
7 Choose Your Installation Method
There are three main hardwood floor installation methods, namely –
- Nail-down installation method: It is the most cost-effective method and is typically used with traditional solid hardwood floors.
- Glue-down installation method: It is a great choice for installing hardwood on concrete floors as it doesn’t require additional vapor barriers and can easily fit into any budget.
- Click-lock installation method: It is the most common choice for people who love to DIY their own hardwood floors.
Consult your hardwood floor installer to decide on the right installation method depending on your wood type and species.
8 Take Care of the Installation Direction
The direction you wish to have your hardwood floor depends on your needs and preferences. Try to determine the direction at first by comparing or contrasting it with the elements of your room.
If you are unable to decide for yourself, stick with the direction in which light is entering the room from a door or a window. You will never go wrong with this method as it will bring in positive energies to your room, and it’s the popular choice preferred by most homeowners.
9 Don’t Forget the Finishing Touches
Finishing touches are important as you may need to attach some flooring accessories after installation. For example, you may need additional planks, door bars, skirting boards, ramps, beadings, pipe covers, etc., to fill up the expansion gaps to allow room for hardwood floor expansions and contractions when there are changes in the temperature and humidity levels.
Also, if you are working with unfinished hardwood floors, you will need to take the time in finishing them for a durable and classy look.
10 Clean and Maintain Your Wood Floors Regularly
Last but not the least, you will need to maintain your hardwood floors after installation to make them last for decades. Cleaning your hardwood floors on a daily basis requires simple actions like swapping, mopping, using cleaning sprays, etc. If there are liquid or food spills, wipe them away immediately.
Moreover, you should apply protector pads or buffers at the bottom of your heavy furniture to protect your floors against scratches and other damages.
Final Words
It’s your responsibility to make your hardwood floors last for decades to come, making your property suitable to live for your future generations. Therefore, a little expense made today will be repaid in thousands tomorrow.
However, the success of hardwood flooring also depends upon the company you are choosing for Hardwood Floor Installation in Naperville or elsewhere. Always try to choose a reputed company to have a long-lasting result. Contact Big Bro Hardwood for genuine and top-rated assistance!